Personalize DayBack’s Appearance by User Role
Our customers often need to deploy different calendar interfaces to specific users, user groups, or Salesforce Profiles. They need a calendar platform that provides users with a tailored and personalized experience.
This blog post will demonstrate a new Custom App Action that allows you to customize each individual’s calendar experience. By leveraging the power of CSS and JavaScript, you can dynamically apply different CSS styles based on user roles and preferences, ensuring that each user enjoys an interface that suits their role while removing features they don’t need. Let’s dive into the details!
User-Specific CSS
Our new Custom App Action offers two approaches to achieve this level of personalization: customizing by individual Account Names or by the Account’s Resource Tags. Each approach has its benefits, and we’ll walk you through how to implement both.
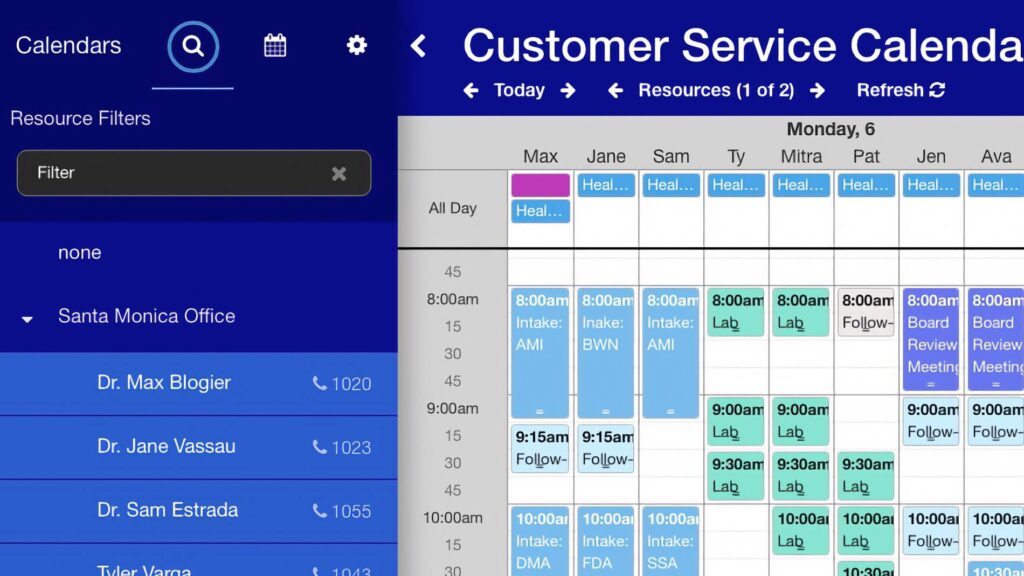
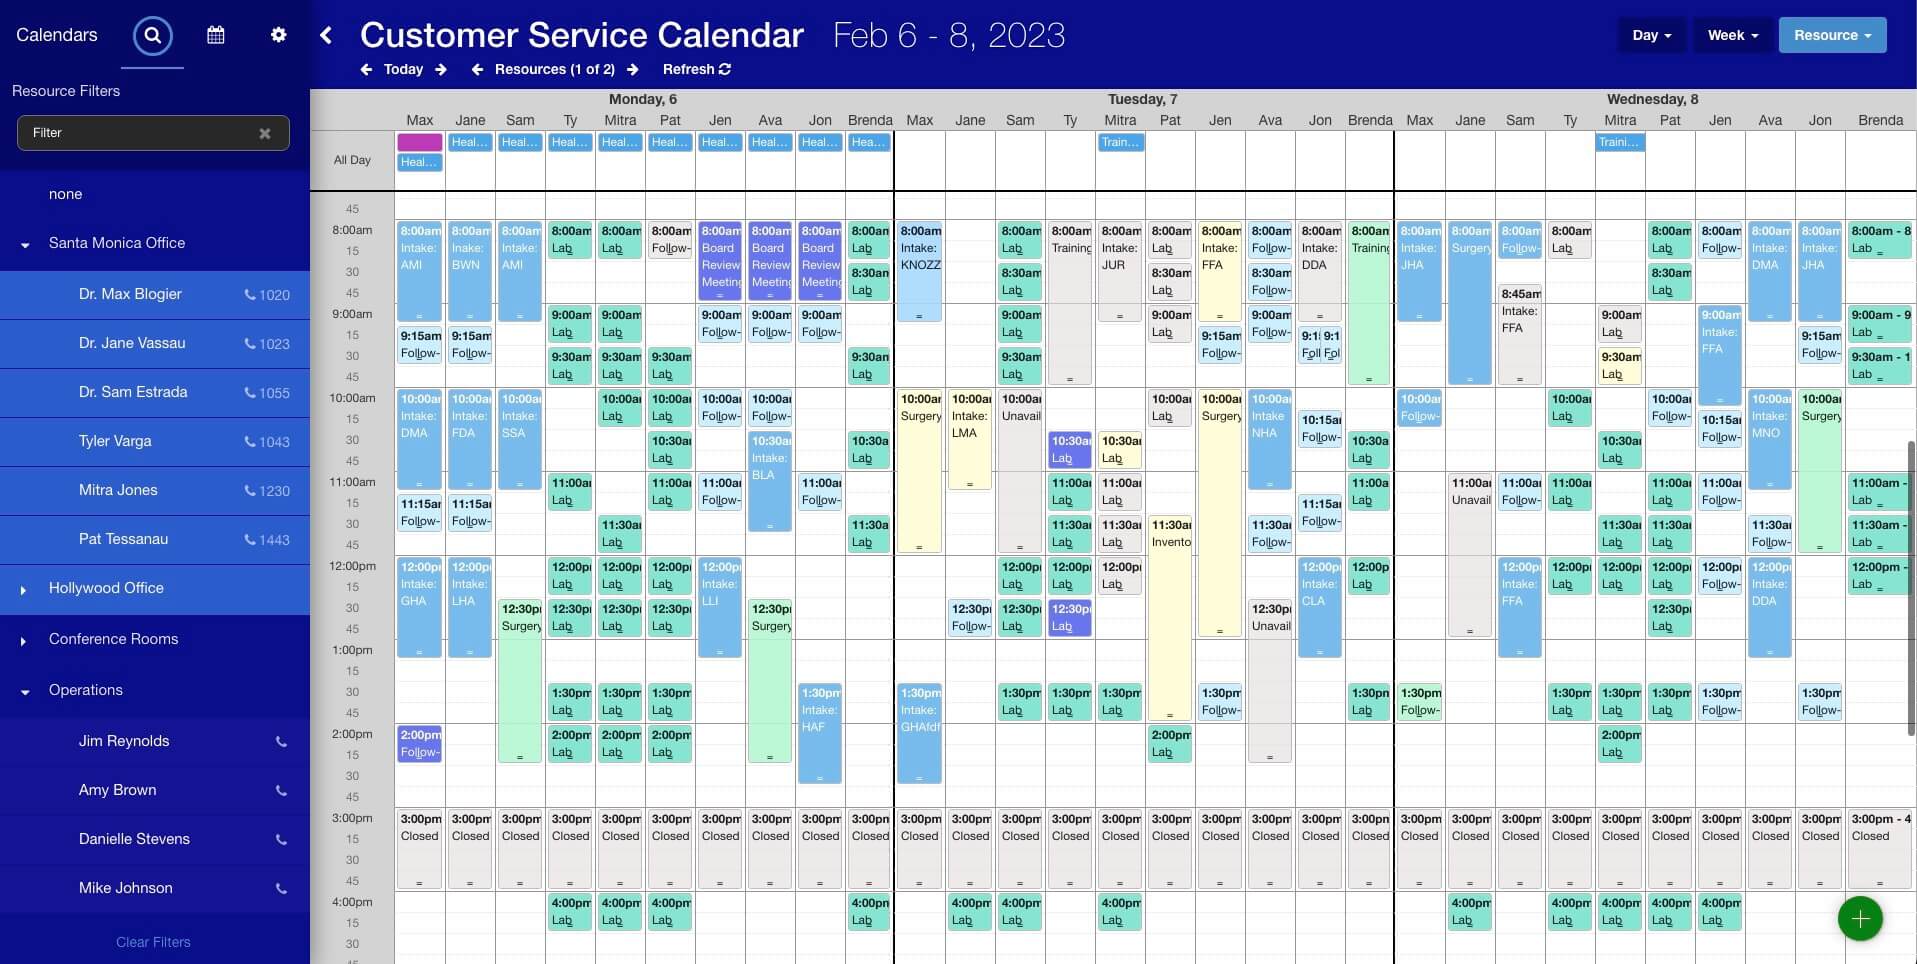
The example below applies a Customer Service stylesheet for users whose Resource Tags indicate their department. For these users, we style the calendar entirely differently:
- We eliminate Bookmarks and Sharing and limit the team to Daily, Weekly, and Resource views.
- Remove the Analytics feature–which for this organization is only used by Sales and Marketing.
- Next, we label the calendar’s header, indicating this view is for the Customer Service team.
- And we apply a blue sidebar and header to match the company’s corporate style.
Download the Action
To configure this type of view, first download the Set CSS By User Custom App Action here:
https://github.com/seedcode/dayback-extensions-library/tree/main/set-css-by-user
You can now customize in two ways: by individual user or by Resource Tags. Let’s start with the simplest approach first.
Custom CSS by Account Name
This first approach looks at a user’s Account Name to determine custom CSS definitions. This means you can assign specific CSS styles based on individual user names. If you choose this method, DayBack will automatically assign each user a unique class name to the calendar HTML container. Let’s break down how to make this work:
Open the downloaded file in your favorite editor:
- Enable Account Name Classes: Begin by setting the
inputs.useAccountNameClassesvariable totrue. This tells DayBack to use Account Names for customization. - Applying Custom Styles: With Account Name Classes enabled, you can now apply specific CSS styles for each user and install them in the CSS section of your Admin settings.
- Let’s say you want to hide certain elements for a user named “Mike O’Neil.” You would write CSS rules like this:
/* Hide Month View navigation for Mike O'Neil */.account-Mike-ONeil .nav .nav-group li:nth-child(7) { display: none; }/* Hide Analytics button for Mike O'Neil */.account-Mike-ONeil .measure-button-container { display: none !important; }
- Class Naming: The Custom App Action will automatically generate your class name based on the user’s name, converting spaces to dashes and removing special characters. For instance, the class for “Mike O’Neil” becomes
.account-Mike-ONeil.
The downside of this approach is that you will have to duplicate your custom CSS for each individual user who needs a different workflow. This may make your code repetitive, and more difficult to maintain as you add more employees.
Custom CSS by Resource Tags
This more advanced approach involves utilizing Resource Tags to apply custom CSS selectors. This approach offers more flexibility by allowing you to assign user roles using Resource Tags. These tags can then be used to determine the appropriate CSS styles for all users who have this tag defined in their user profile.
Tags are great because you can load them automatically from Salesforce or FileMaker based on the user’s existing profile and role.
Here’s how you can set it up. Open the downloaded file in your favorite editor…
- Activate Resource Tags: To enable Resource Tag CSS customization, set the
inputs.useResourceTagvariable totrue. - Configuring Resource Tags: Assign specific tags, such as
dbkCSS:Role, to users based on their roles. For example:- Reily from Customer Support could have the tag
dbkCSS:CustomerService - Lee from Sales could have
dbkCSS:Sales - Joe belongs to both Management and Finance, so they have both
dbkCSS:ManagementanddbkCSS:Financetags in their profile.
- Reily from Customer Support could have the tag
- Applying Styles: DayBack will recognize the Resource Tags and apply the corresponding styles. For instance, to hide elements for the Sales team, you’d use:
/* Hide Month View navigation for Sales team */.dbkCSS-Sales .nav .nav-group li:nth-child(7) { display: none; }
- Combining Tags: Users can have multiple tags, allowing you to create styles for different combinations. For instance, if Joe is in both Management and Finance, his calendar would have the classes
.dbkCSS-Managementand.dbkCSS-Finance. Knowing this, you can enable or disable Management-specific features, followed by the Finance features.
Use Both Account Names and Tags
DayBack also allows you to use both Account Names and Resource Tags simultaneously. By setting both useAccountNameClasses and useResourceTag to true, you can create complex customizations. This approach offers the ability to set broader styles based on roles and further refine them for individual users using CSS class selectors.
Specific CSS for Salesforce Profiles
You can use similar techniques to load custom CSS for specific Salesforce Profiles. Note that we use the profile id in the code below because not all users can query for the profile name. context.user.profileId will return the current user’s profile id.
Let’s say you’d like to use different CSS for your Experience Cloud users, and you have a specific Salesforce Profile for them. Here’s how you’ll determine if a user is a Community User by their Profile Id:
const context = fbk.context(); let isExperience = false; if (context.user.profileId === '<communityprofileid>') { isExperience = true; }
You can then add a class that will apply to all your Community Users. The code below adds a new parent class to the calendar so that you can use that to create CSS that only applies to your Experience Cloud users:
const body = document.body; body.classList.add('is-experience-cloud');
Conclusion
With DayBack’s flexible customization options, you can create a truly personalized experience for each user. Whether you choose to utilize Account Names, Resource Tags, or a combination of both, the result will be a calendar application that adapts to your users’ roles and preferences. By harnessing the power of JavaScript and CSS, you can enhance the look and feel of DayBack to provide an exceptional user experience.
For more in-depth information and examples, check out the DayBack documentation on Resource Tags and automatically pulling Resources and Resource Tags. Also, check out our post on the variety of ways that Tags can come in handy! Happy customizing!
Leave a Reply