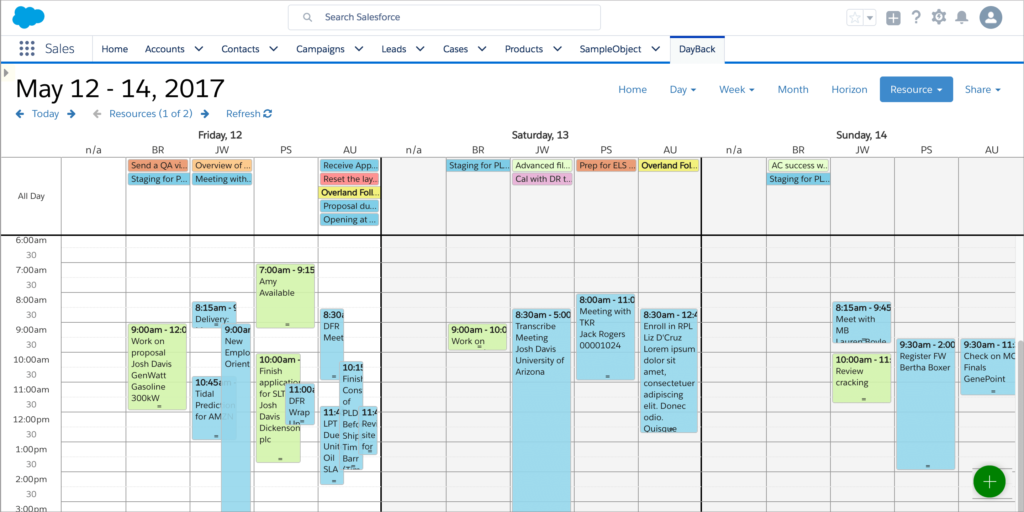
DayBack Calendar shows conflicts and double-bookings visually. But sometimes you’re editing events on other Salesforce pages and won’t necessarily know that you’re inadvertently creating a conflict.
Wouldn’t it be great if Salesforce could warn you when any of your edits created a conflict?
In this article we’ll describe two techniques for detecting date range conflicts in Salesforce and warning your users. If you want to cut to the chase, I think the second method–using a trigger–is the most flexible. That does involve writing Apex, but you can copy and paste our example code to get started: it’s not that tough.
These methods work great in conjunction with DayBack Calendar, but they can also be used on their own to warn users about conflicts.
Two Methods
Method 1: Using Process Builder and Flows works great but doesn’t give us as many options for notifying the user. This is because autolaunched flows can’t call screens or dialogs. What they can do is set fields and I imagined that we could simply add some field validation and the flow would end with the field validation letting the use know there was a conflict. Unfortunately, what the user sees instead is a warning that the flow could not be finished: they never see the validation warning itself. Still, your users will see the word conflict in a new custom field and perhaps that’s enough warning for them. Go to Method 1
Method 2: Triggers end up being more flexible because we can use field validation at the end to go loud and let the user know that they’ve created a conflict. Best of all, this field validation is a blocking event and the user won’t be able to save the record until the conflict is resolved. This works great wherever the user is creating or editing a record, be that in DayBack or in other Salesforce pages where they might not “see” the conflict otherwise. (Here’s a short movie of this trigger in action.) Go to Method 2
Date Range Conflicts in Salesforce – Method 1
Using Process Builder and Flows
When we first looked at this problem, it seemed like there must be a way to do this with clicks not code. And there is: you can create a flow that tests for conflicts. This is pretty cool, especially how the Process Builder passes query information into the flow. But the limitation here is that we have very few ways to alert a user at the end of an autolaunched (headless) flow. This method ends with placing the word “CONFLICT” into a field in the event being edited. Maybe that’s enough for you, or maybe you can run a report on that later? If that’s not enough warning, skip to method 2.
Here’s how to do this with Flows.
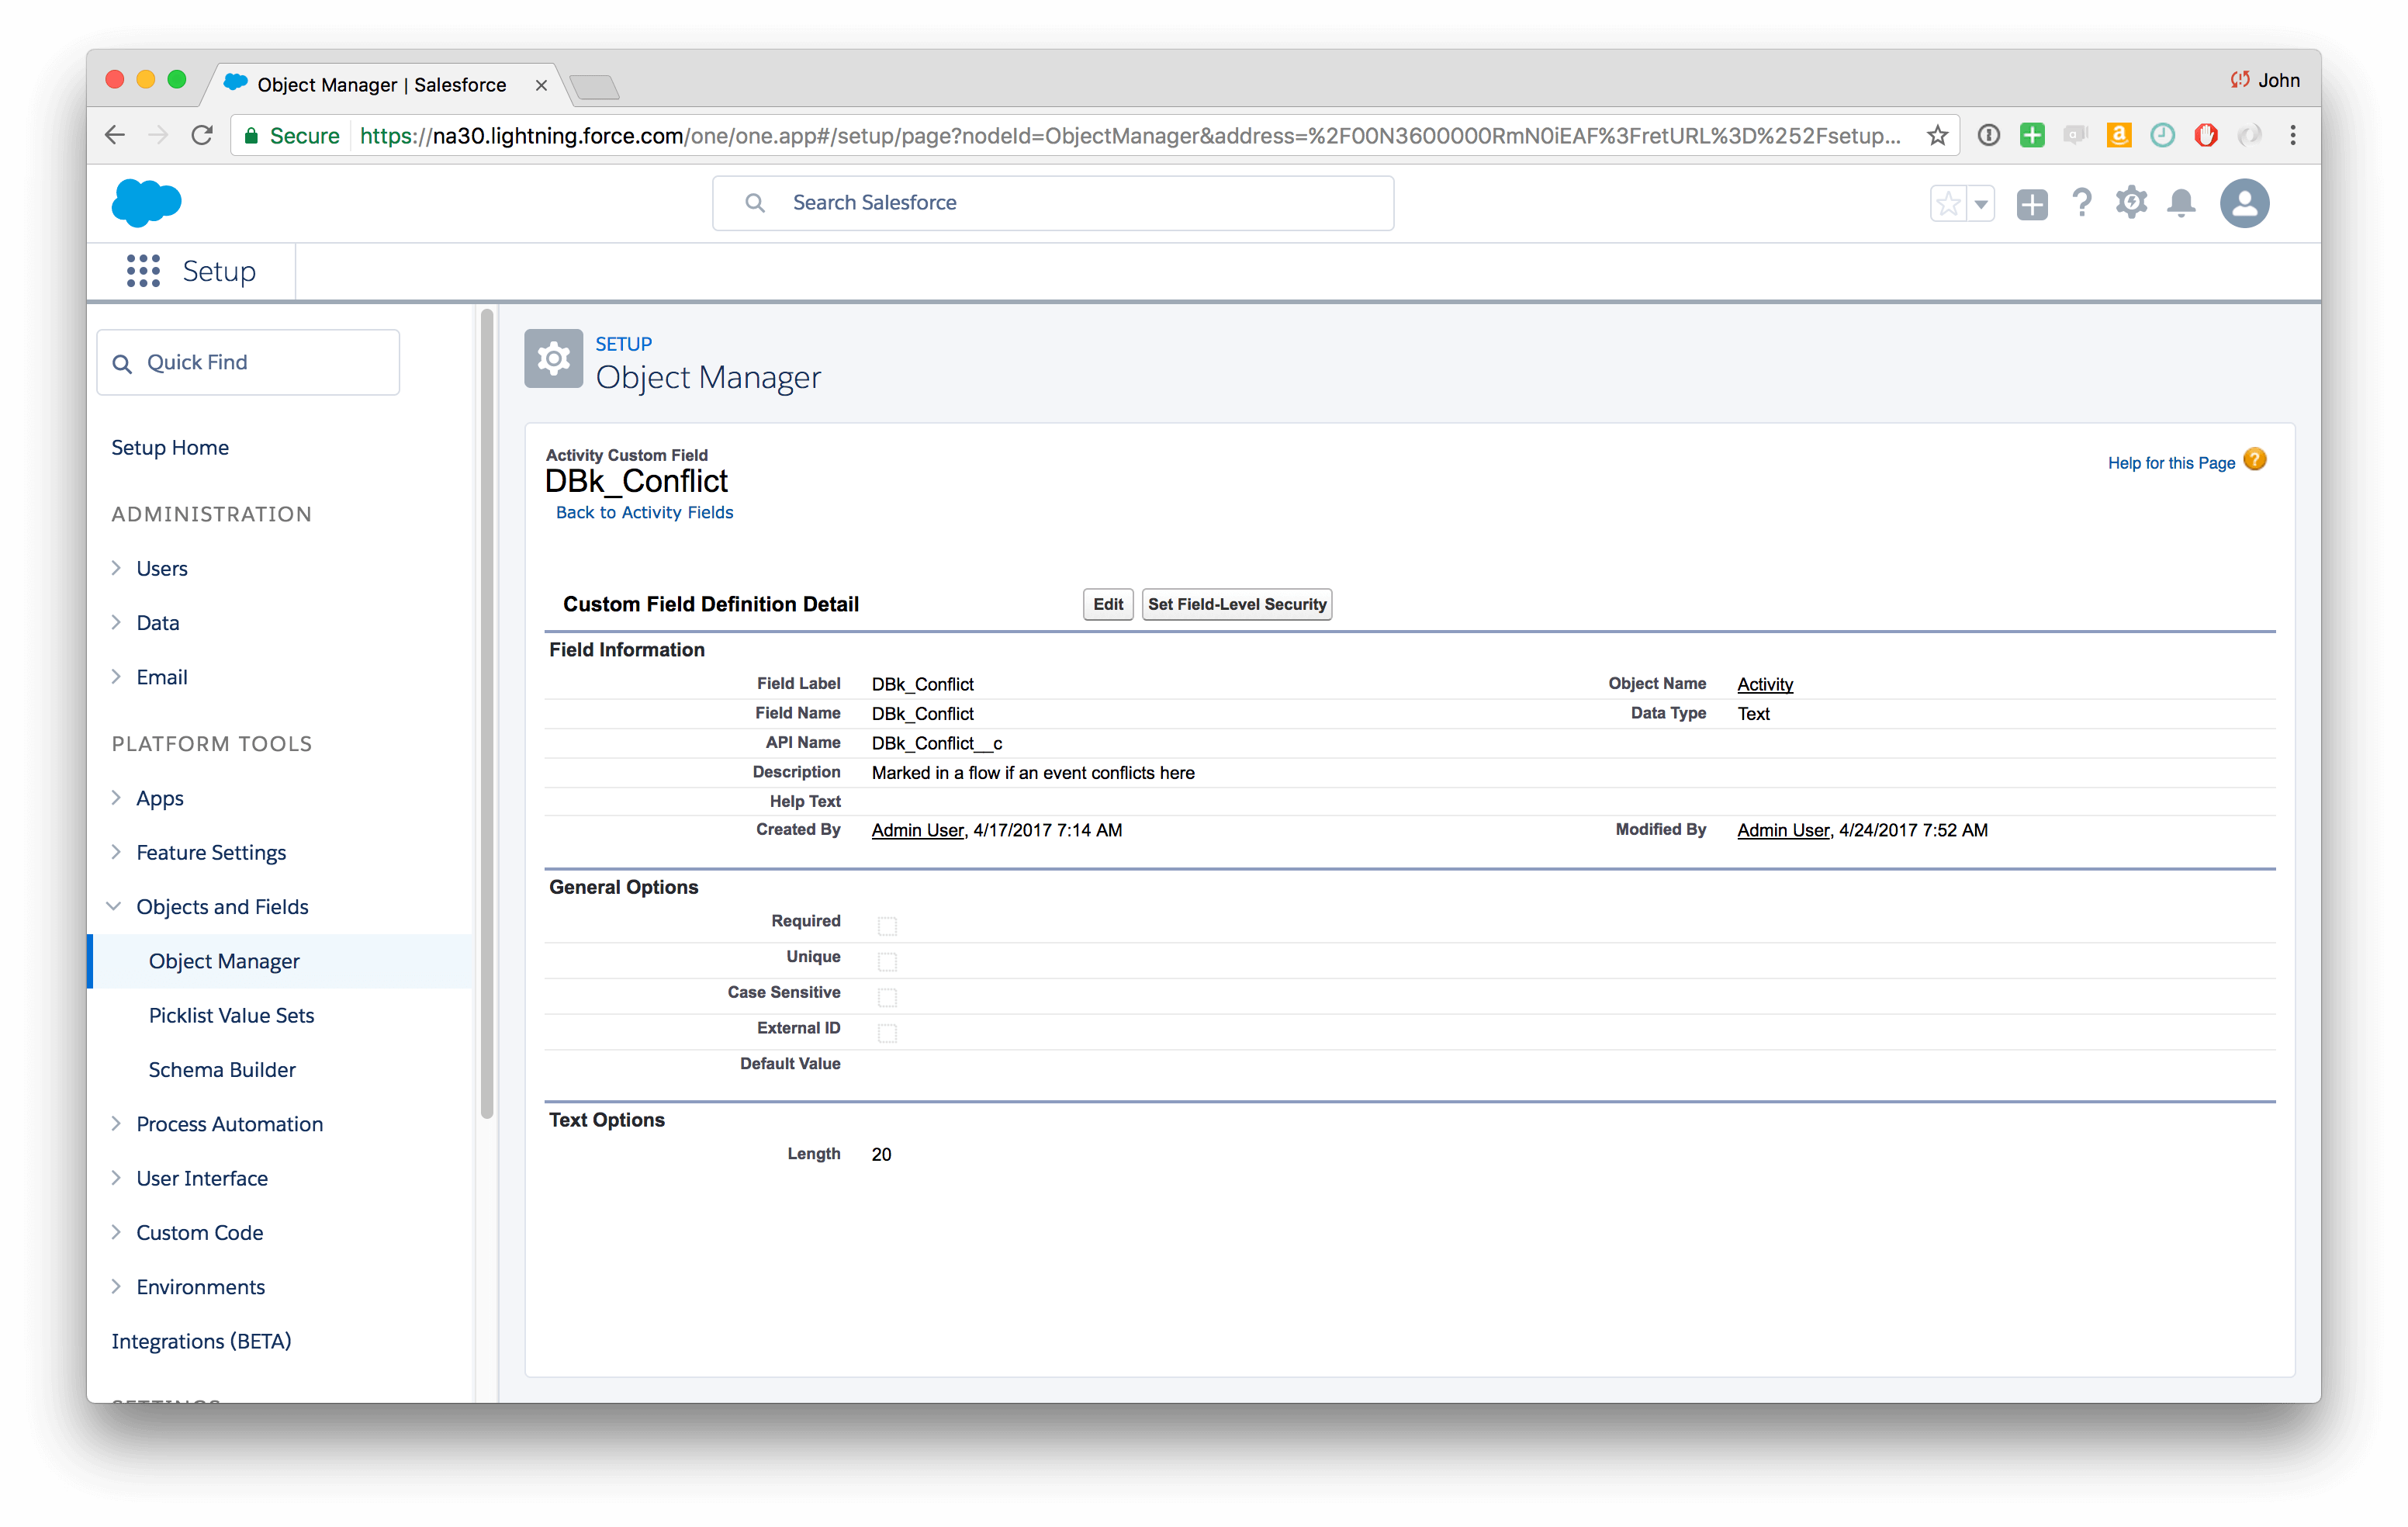
1. Create a new field to hold the conflict notification
One of the limitations of flows is that a flow initiated from a headless process can’t show screens or dialogs, so you’ll need the outcome of the flow to also be headless. (Headless like a record modification, as opposed to something a user interacts with like a screen or alert).
In this example we’ll be looking for conflicts in the Event object, so create a new text field in Event (or in your object).
2. Create a New Flow
The flow will eventually be called by Process Builder and that will pass some criteria into the Flow–criteria like what date range would constitute our conflict. So while we’ll actually work in the Process Builder first, it helps to have an empty Flow created so you can reference it in Process Builder.
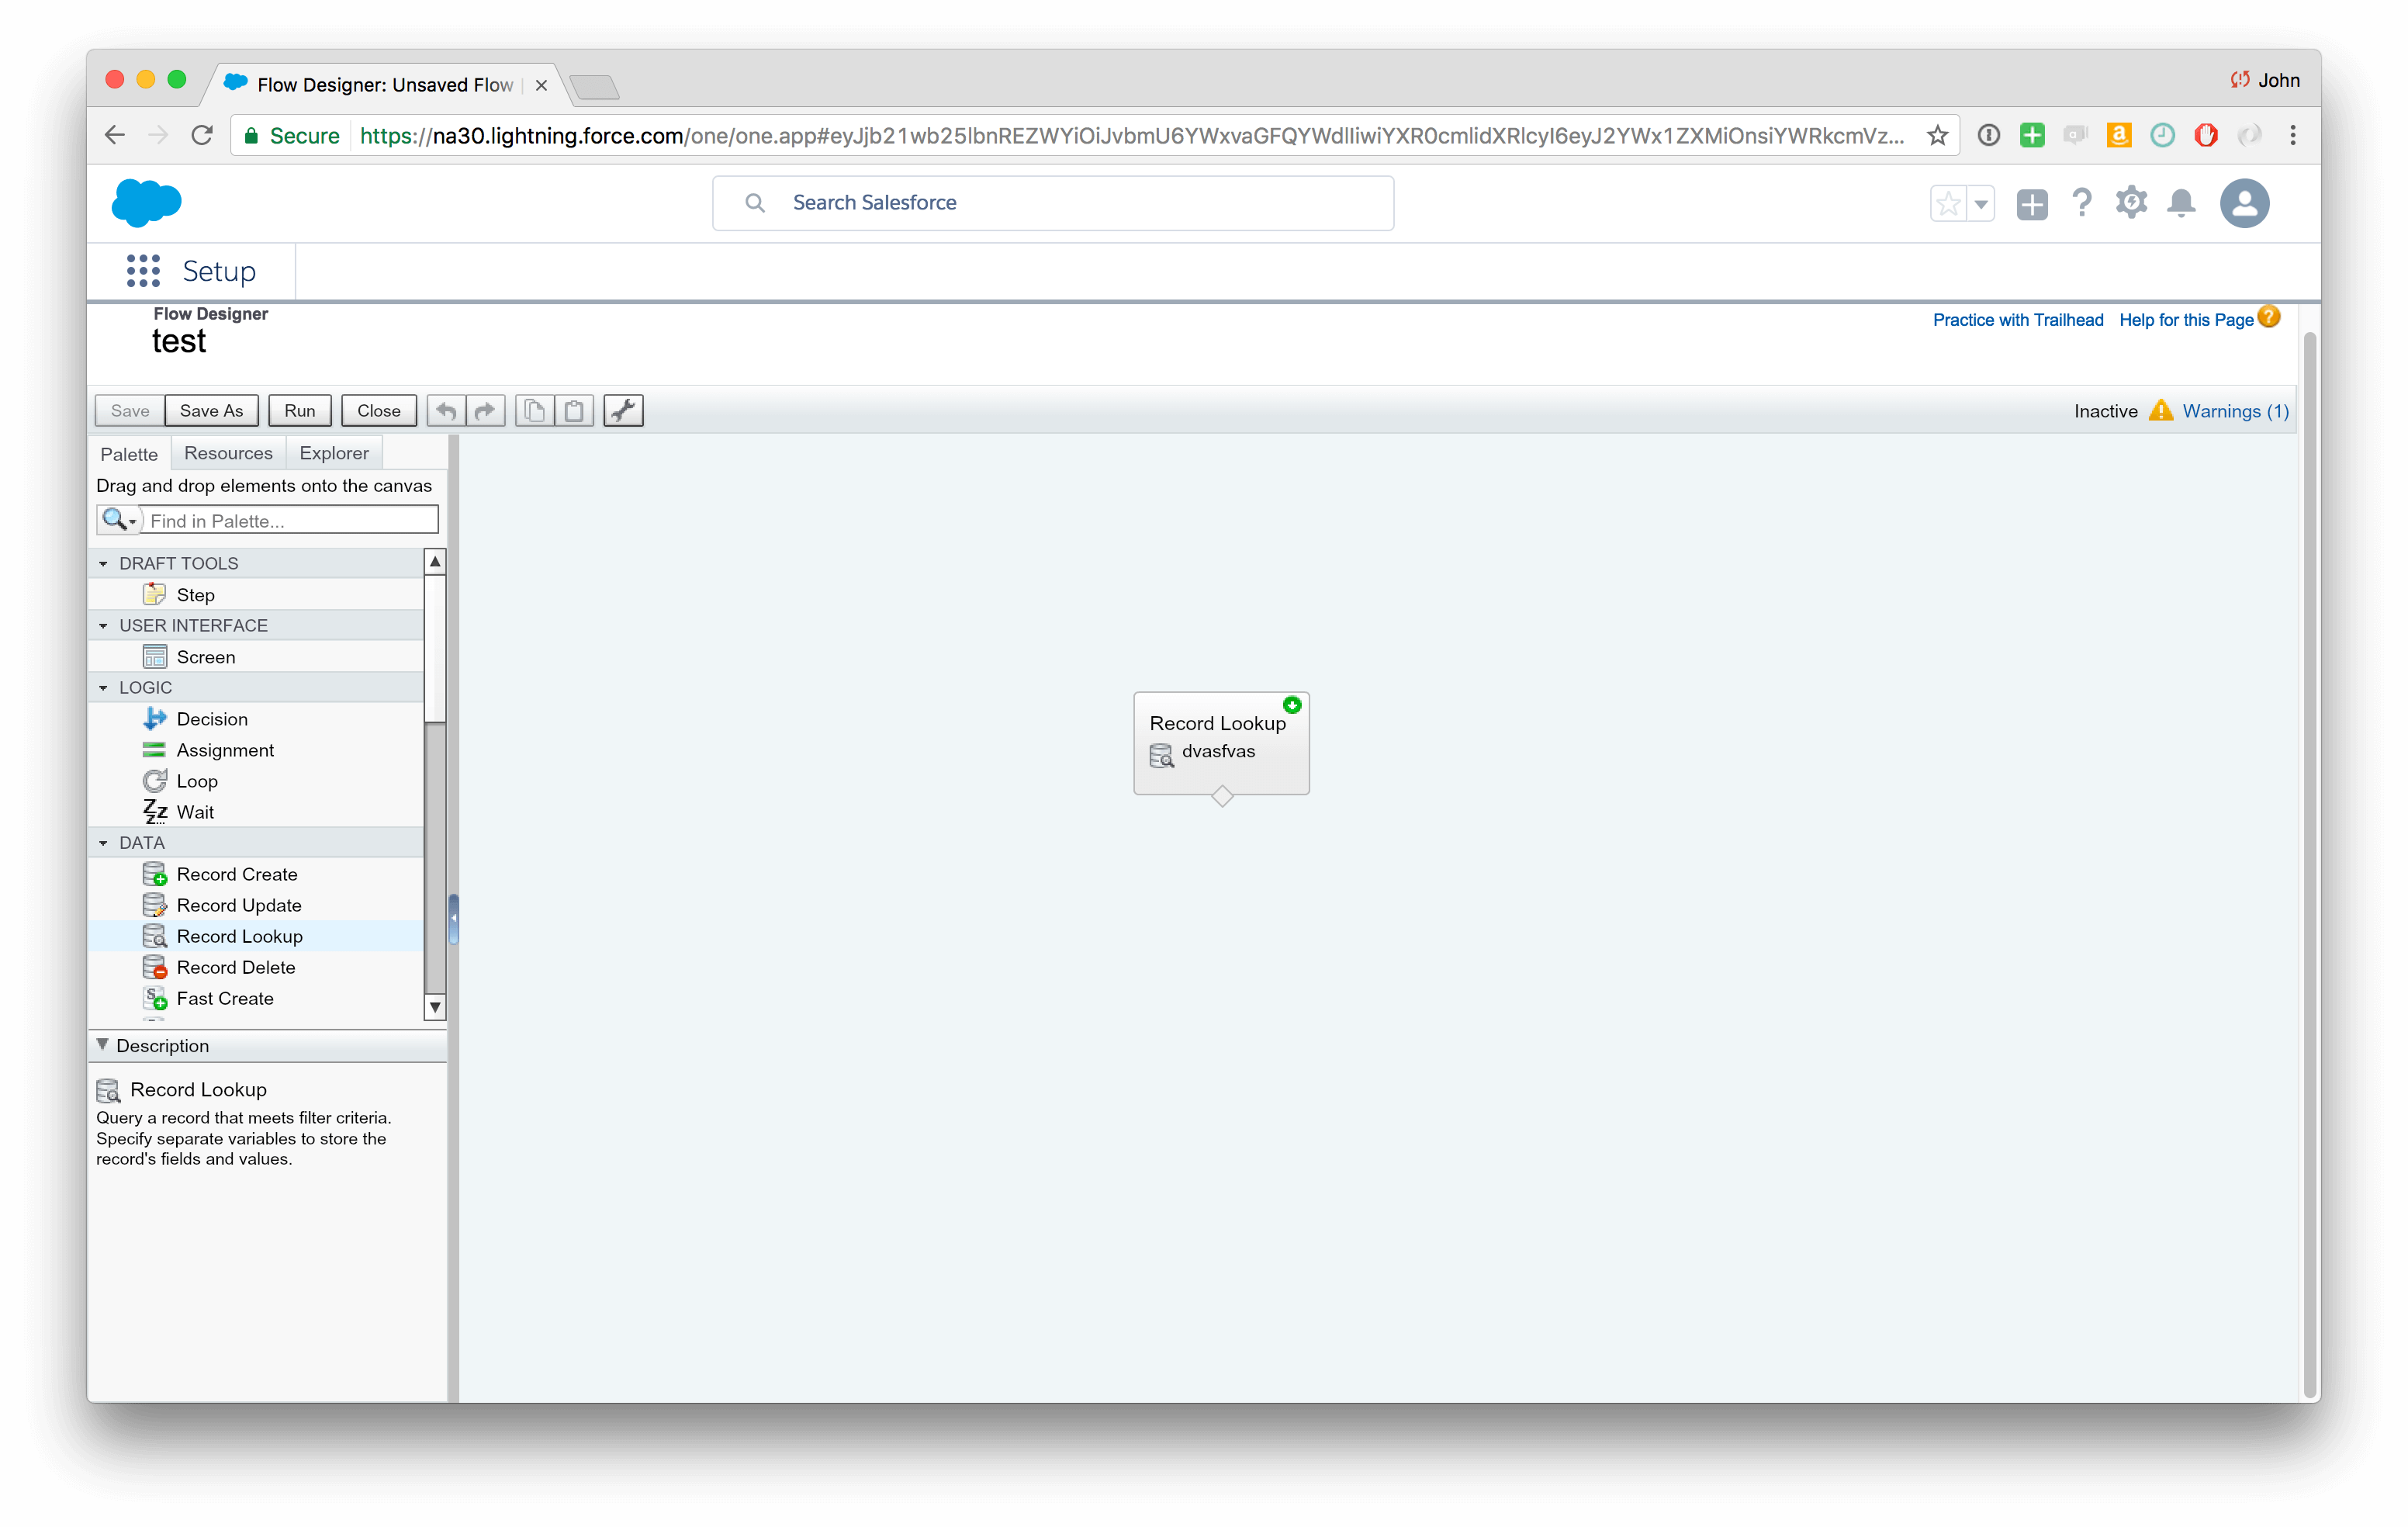
Search for “Flows” in the Setup sidebar and click “New” to create a new Flow. You’ll get a new blank workspace…
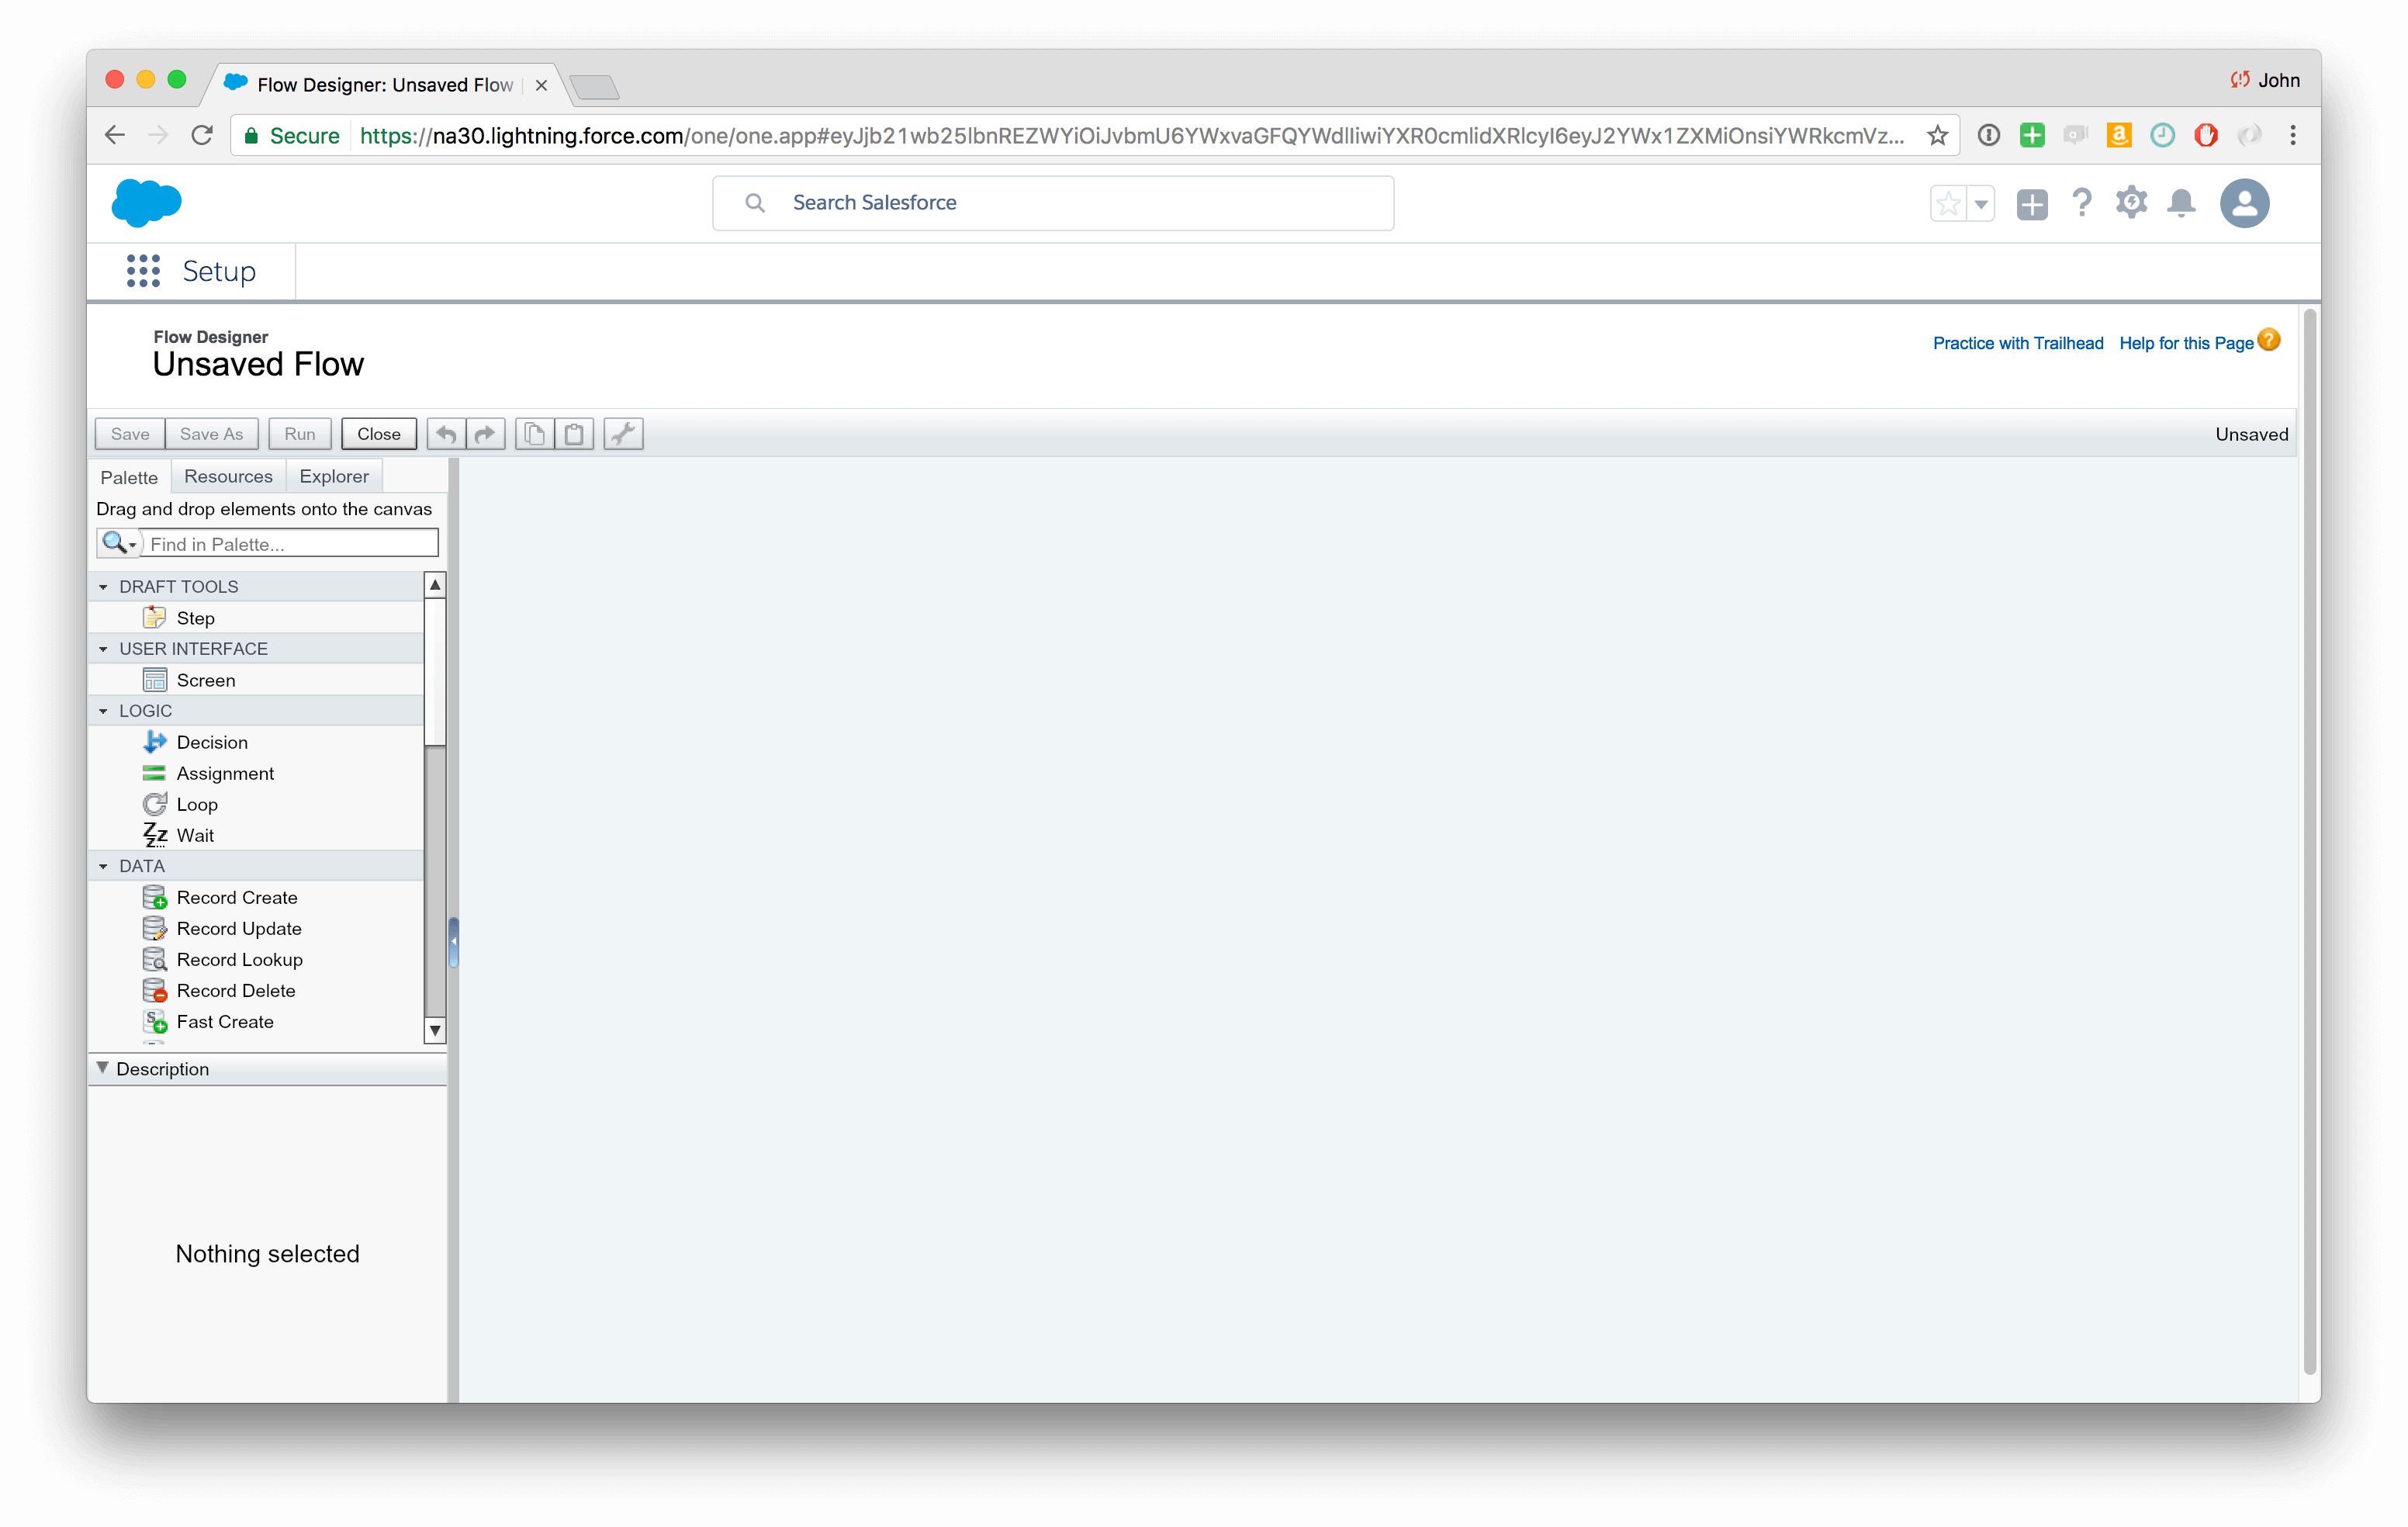
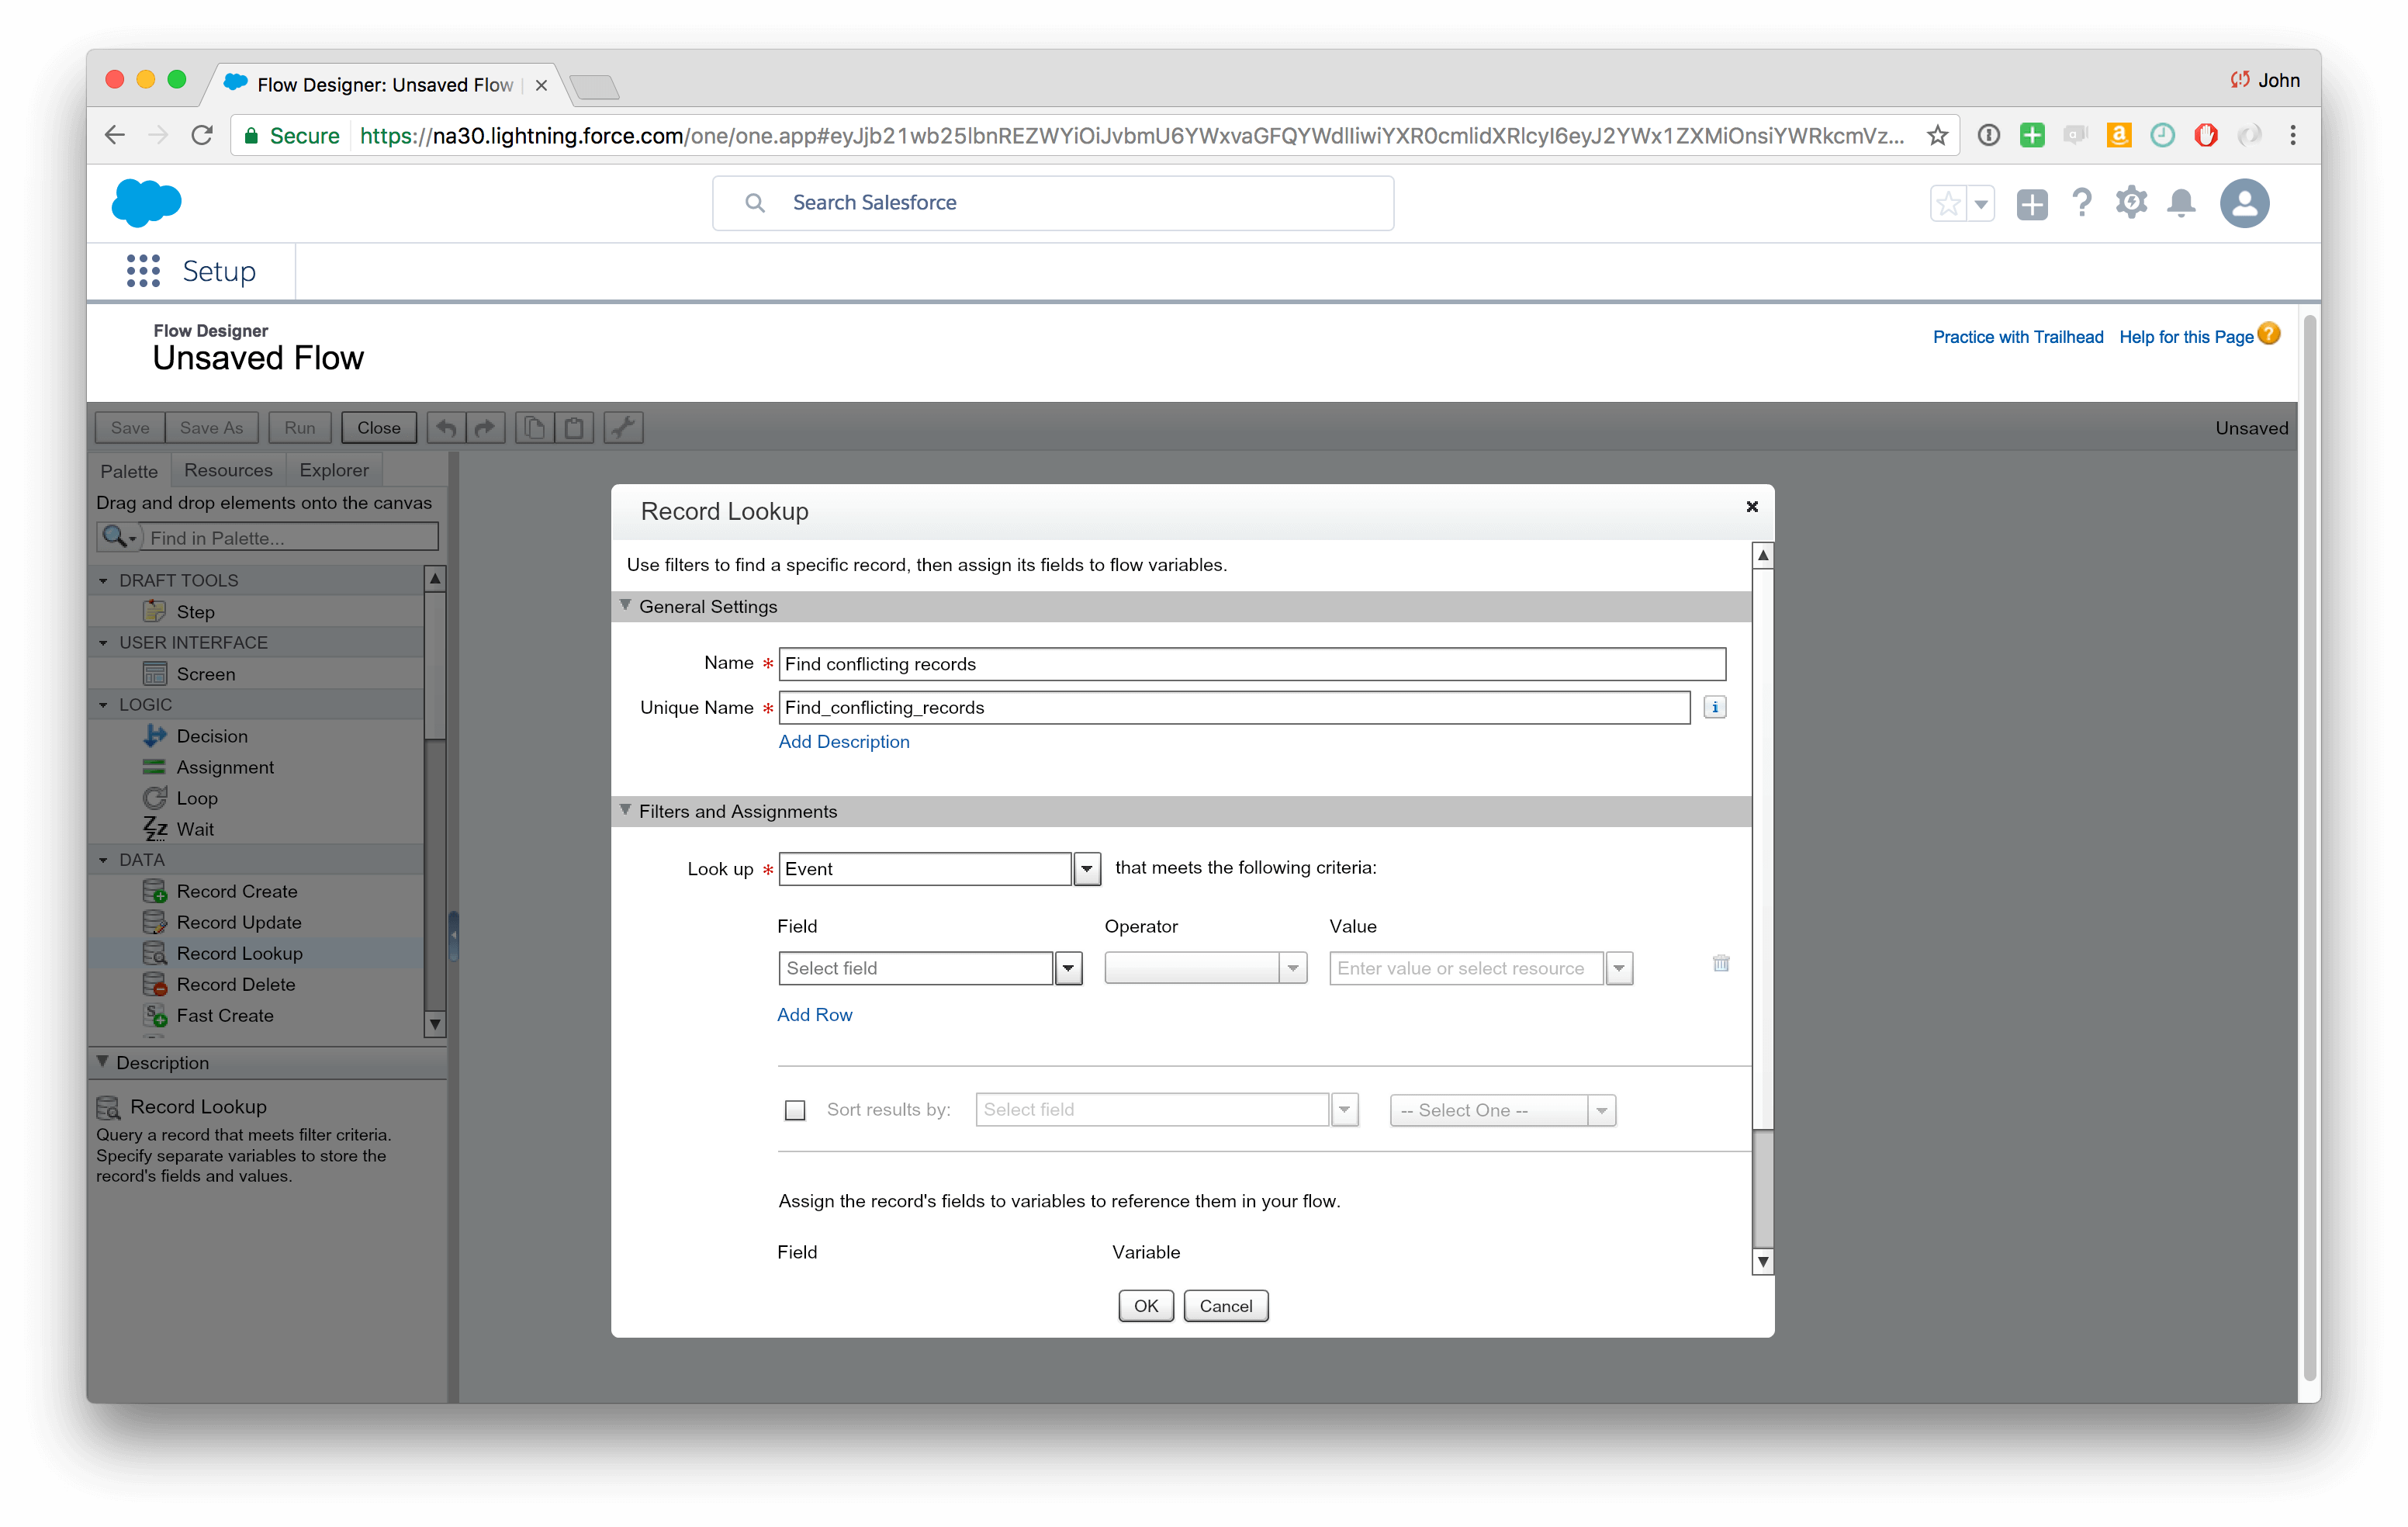
…Drag the “Record Lookup” object into the canvas and fill out the general settings and lookup object. Then delete the two blank rows (you’ll see two trash cans) so you can click “OK” while this query is still incomplete.
Now hover over the Record Lookup object and click the green “down” arrow, signifying that this is the object which starts your Flow (you can’t call this item in Process Builder unless it has a starting point).
Finally, click “Save” in the upper right to save your Flow with a unique name like “Flow-Flag Conflicting Record”. Be sure to save it as the type “Autolaunched Flow” (i.e. a “headless” Flow). You’ll see some warnings but don’t worry about them yet, we’ll come back here to flesh out the flow once we’ve passed in some criteria from Process Builder in the next step.
3. Process Builder
Search for “Process Builder” in the Setup Quick Find and click “new” to create a new process. Change each of the following aspect of the process:
• After “Start”, choose “Event” as the Object and start the process when “a records is created or edited”.
• In the criteria, just give it a name and select “No criteria-just execute the actions!”
• For the actions (see the screenshot below) select “Run Flow” and then select the Flow you created above.
• The “Set Flow Variables” section is where this gets pretty cool. Here you’ll pass in three variables that your flow will need to test for conflicts.

4. Complete the Flow
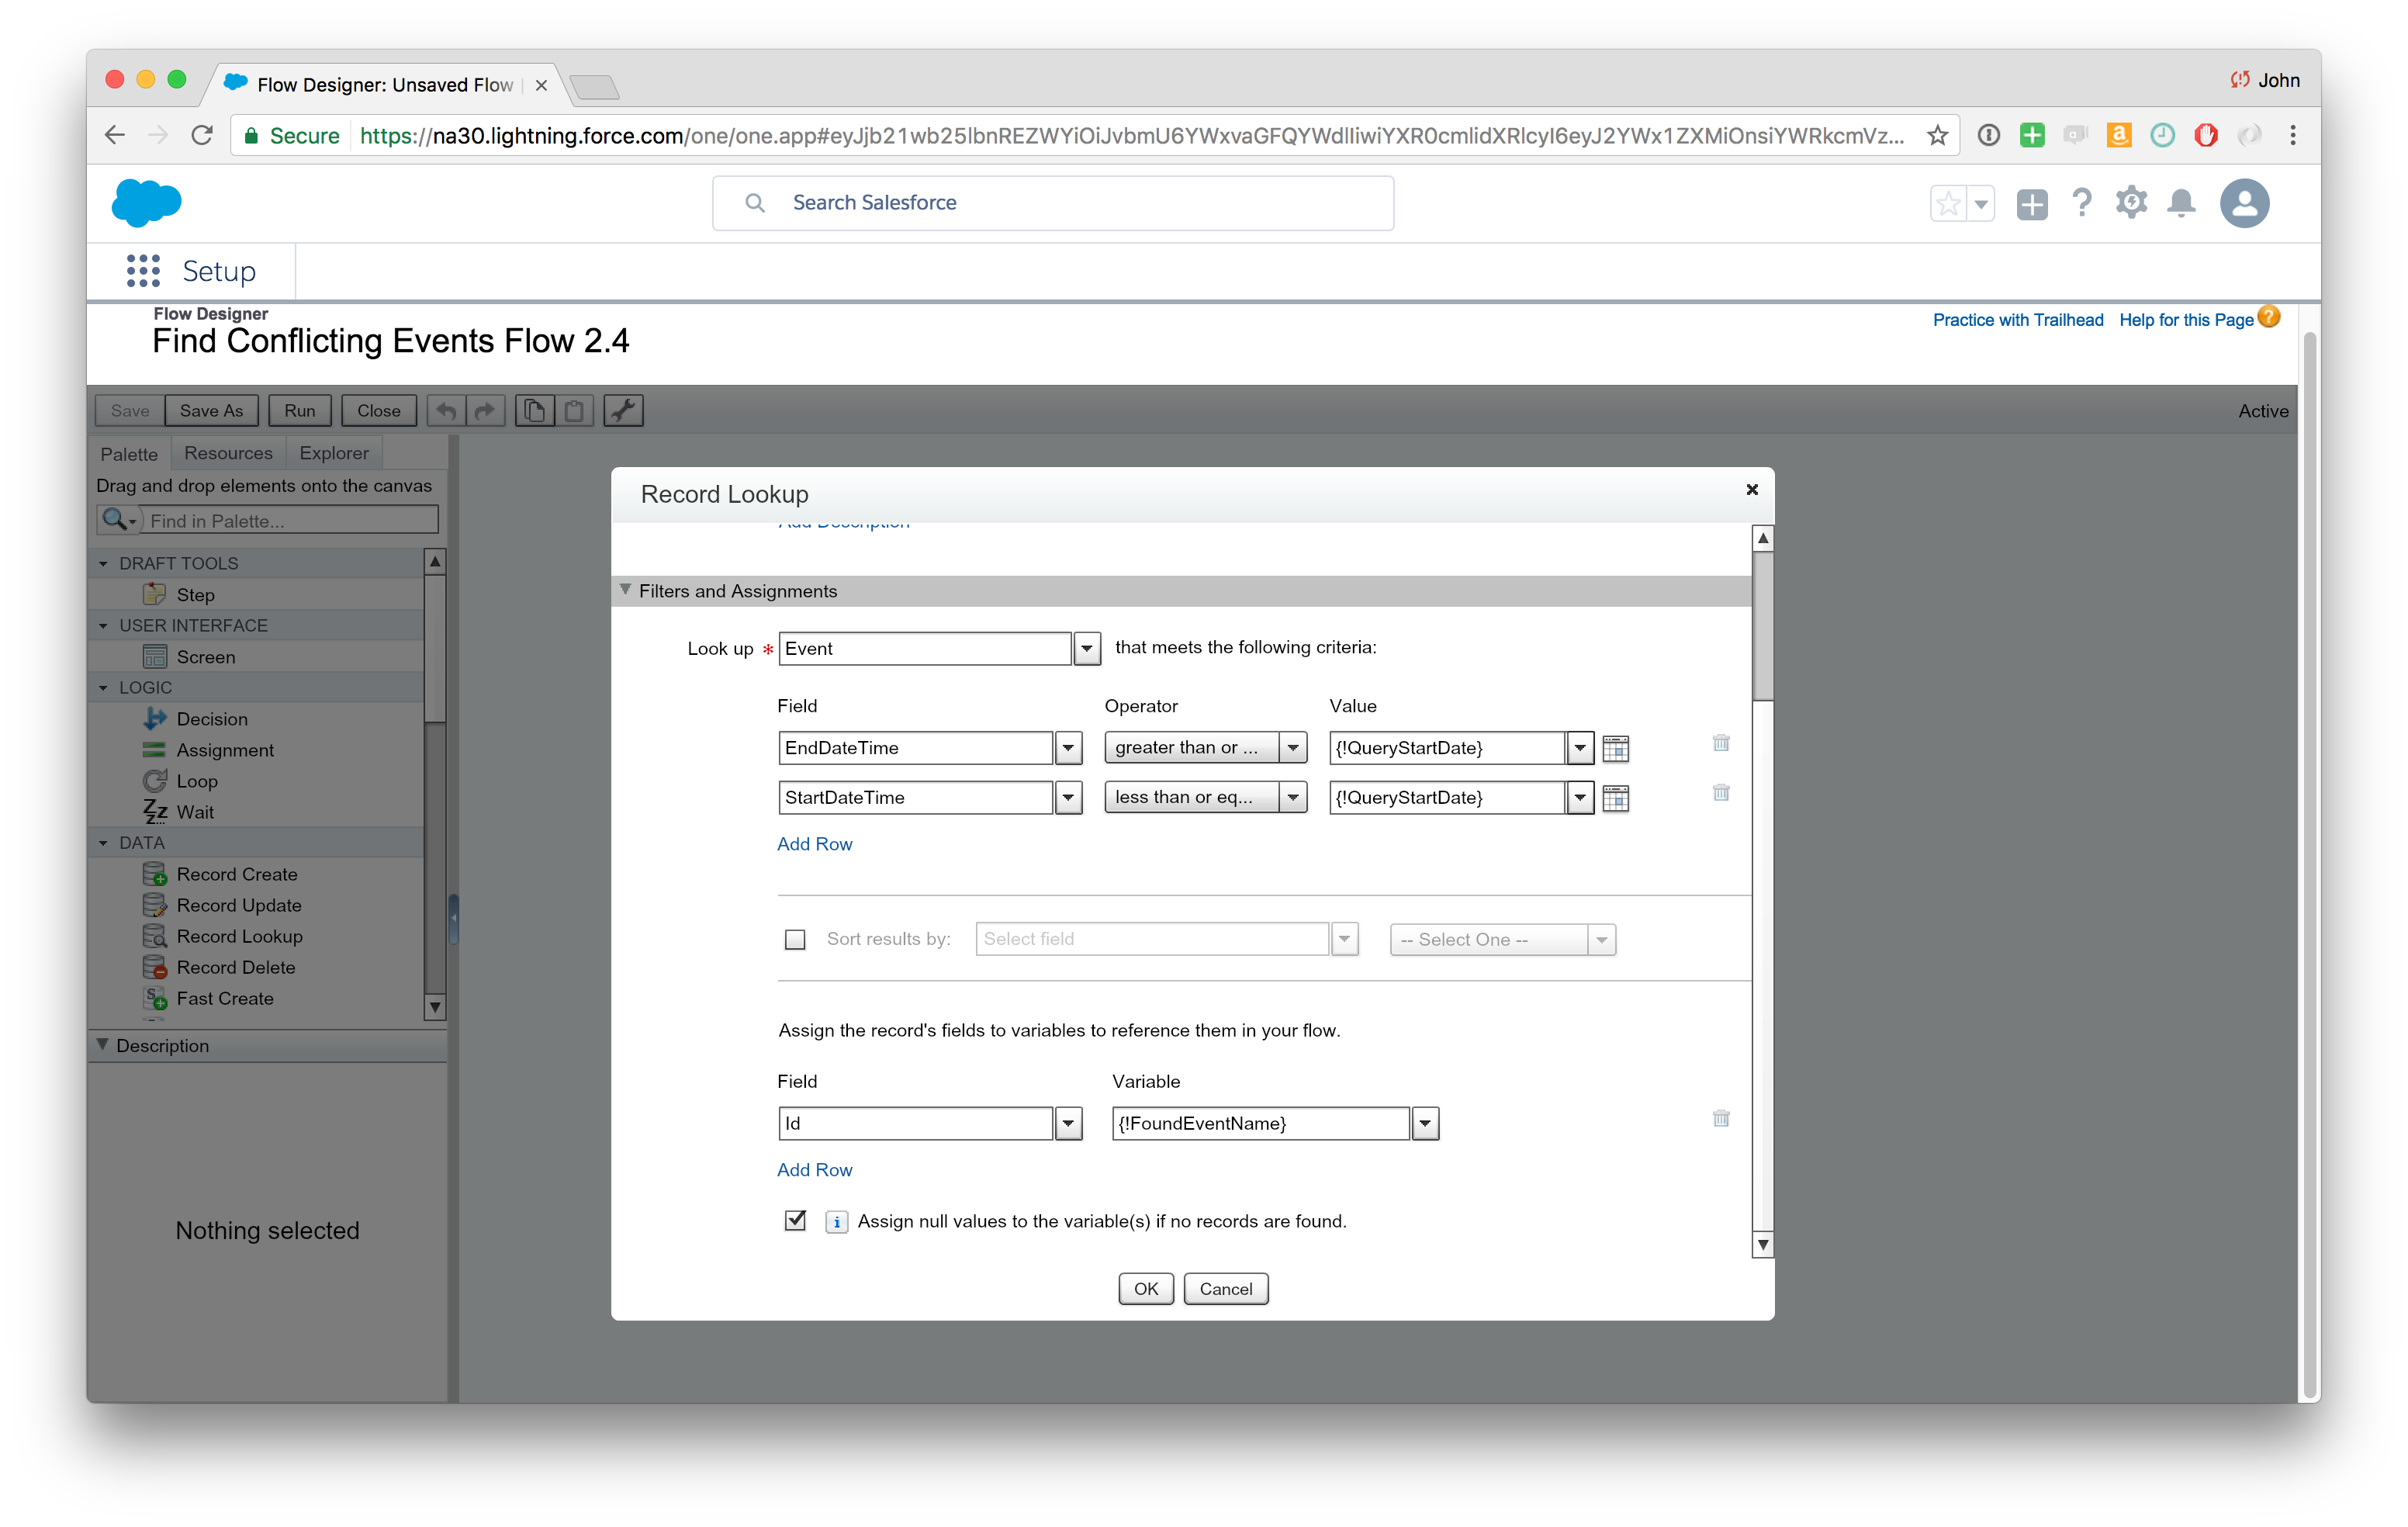
At this point you can return to the flow and edit your record lookup, completing the “Filters and Assignments” section. Notice how you use the QueryEndDate and QueryStartDate variables your defined in the Process Builder above:
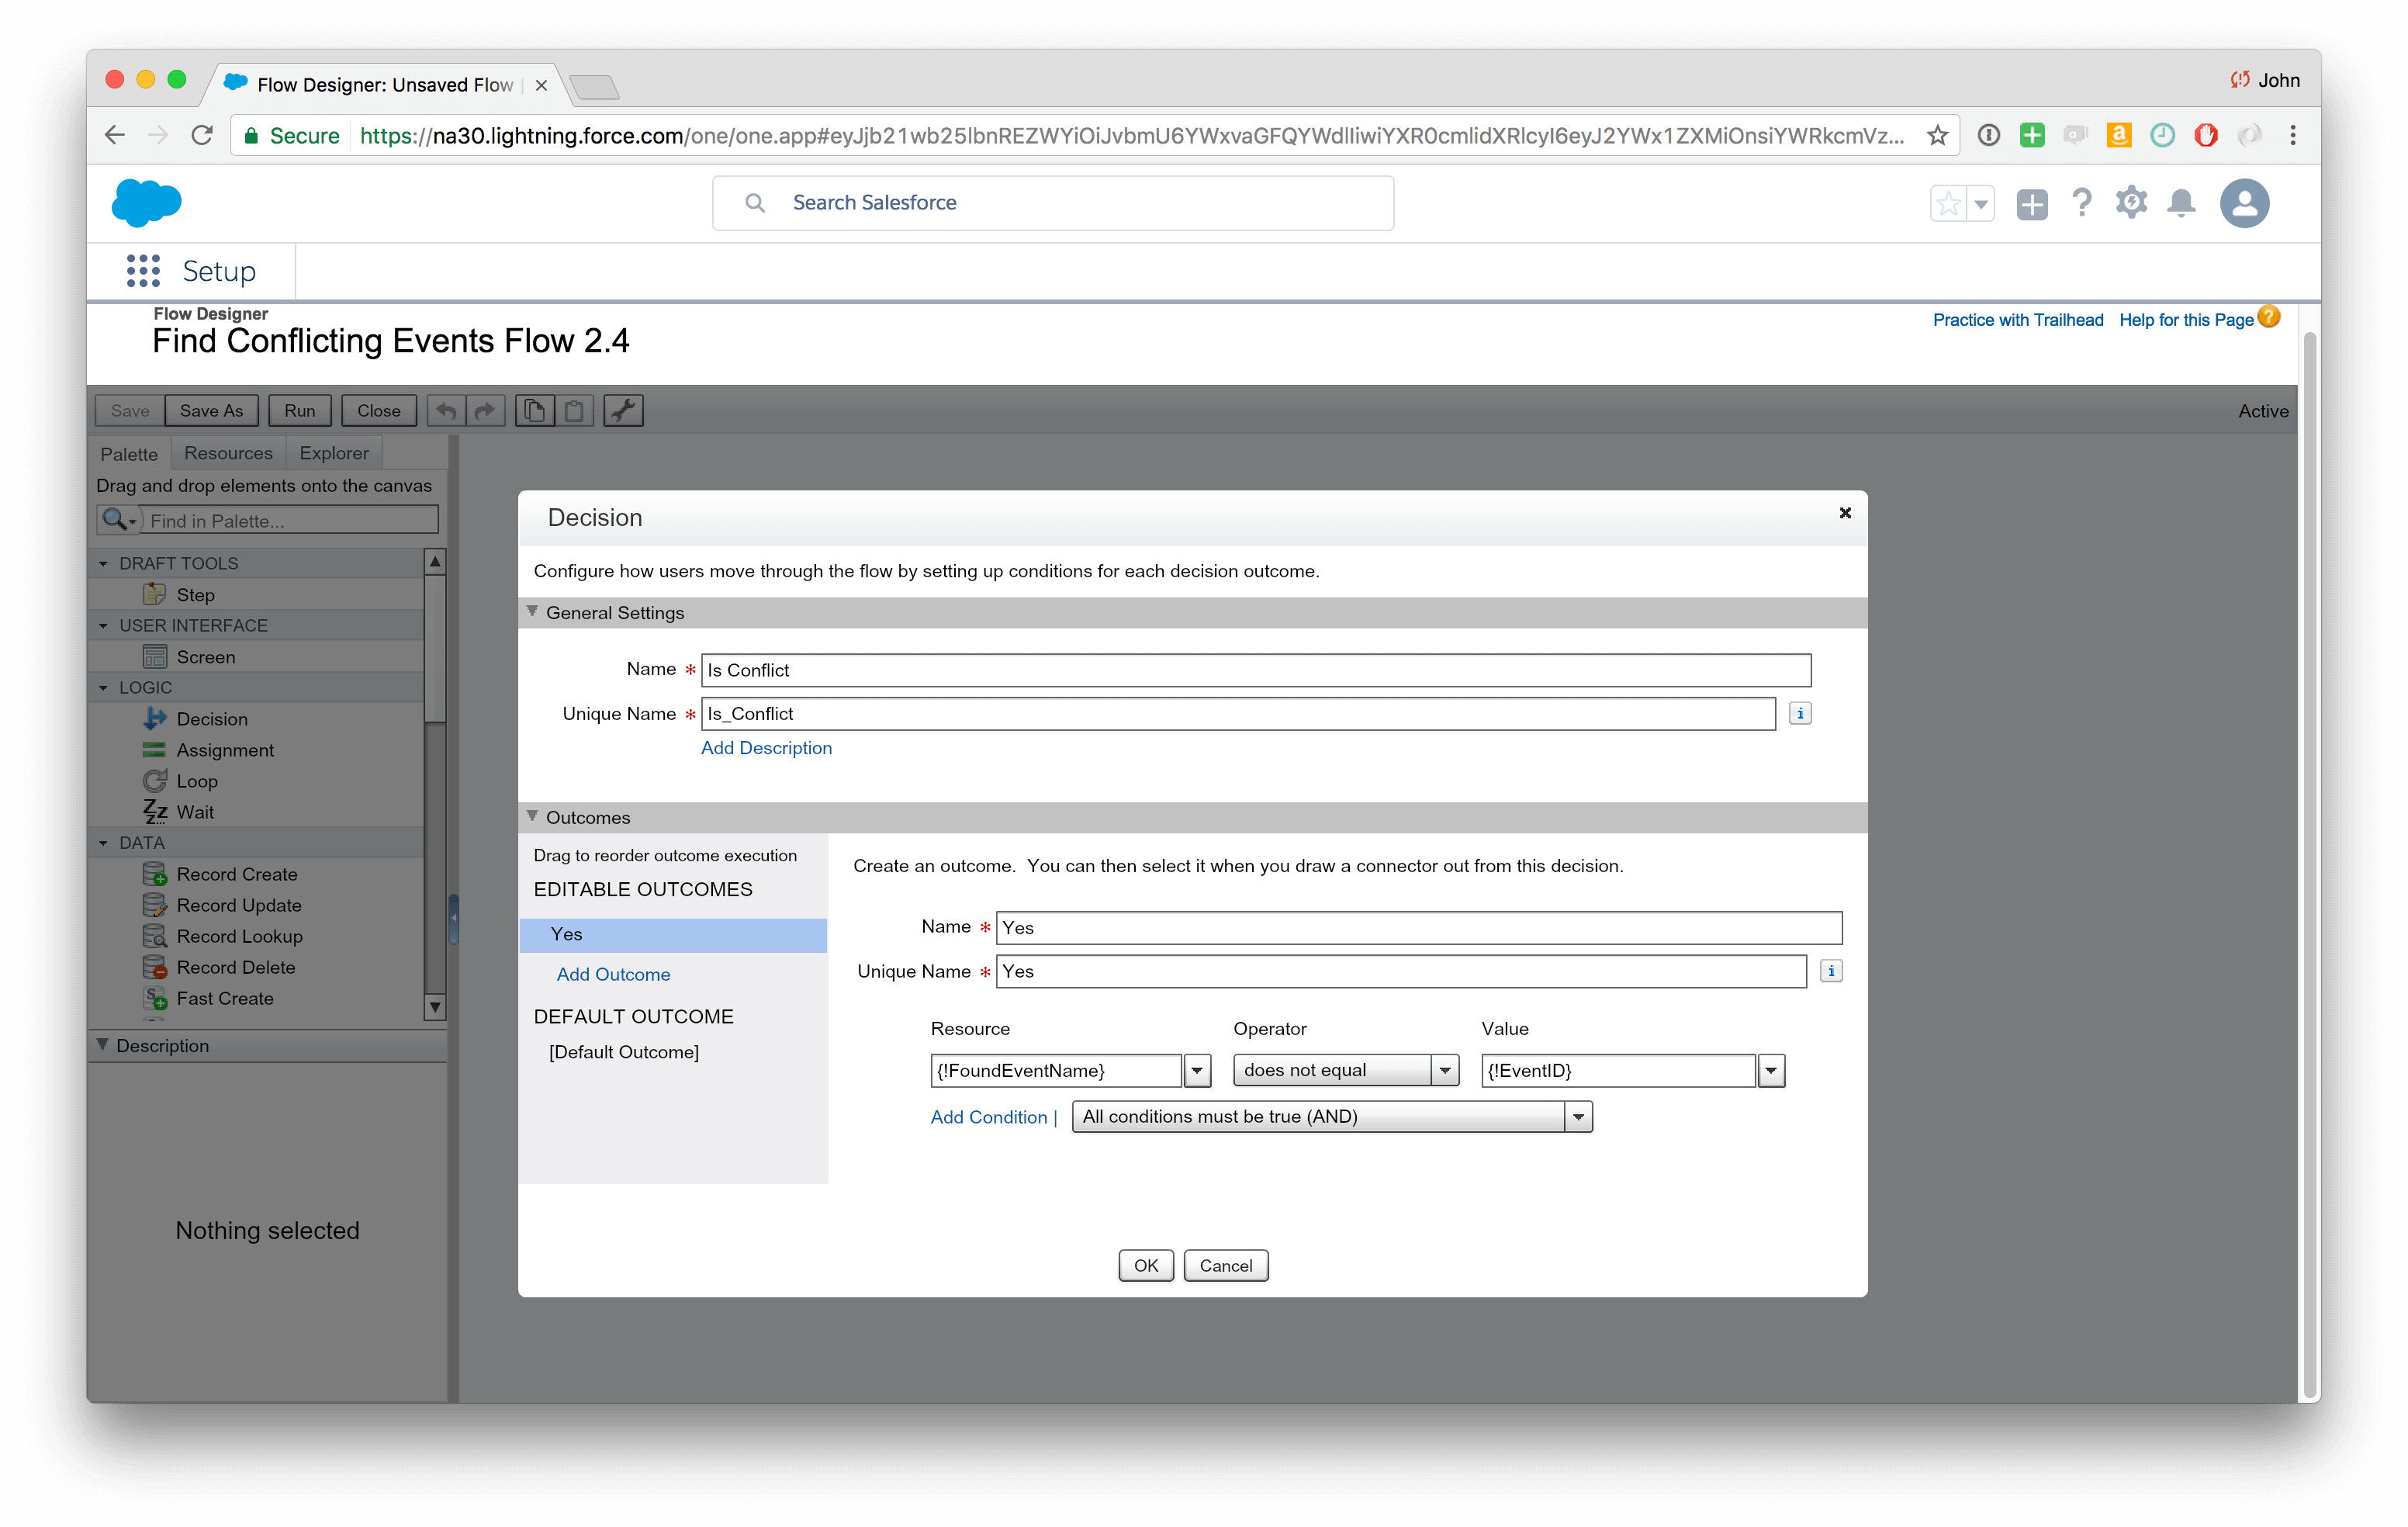
Now drag a “decision” into the flow and create a “yes” outcome as shown below. You’ll use the “FoundEventName” variable created in your record lookup above:
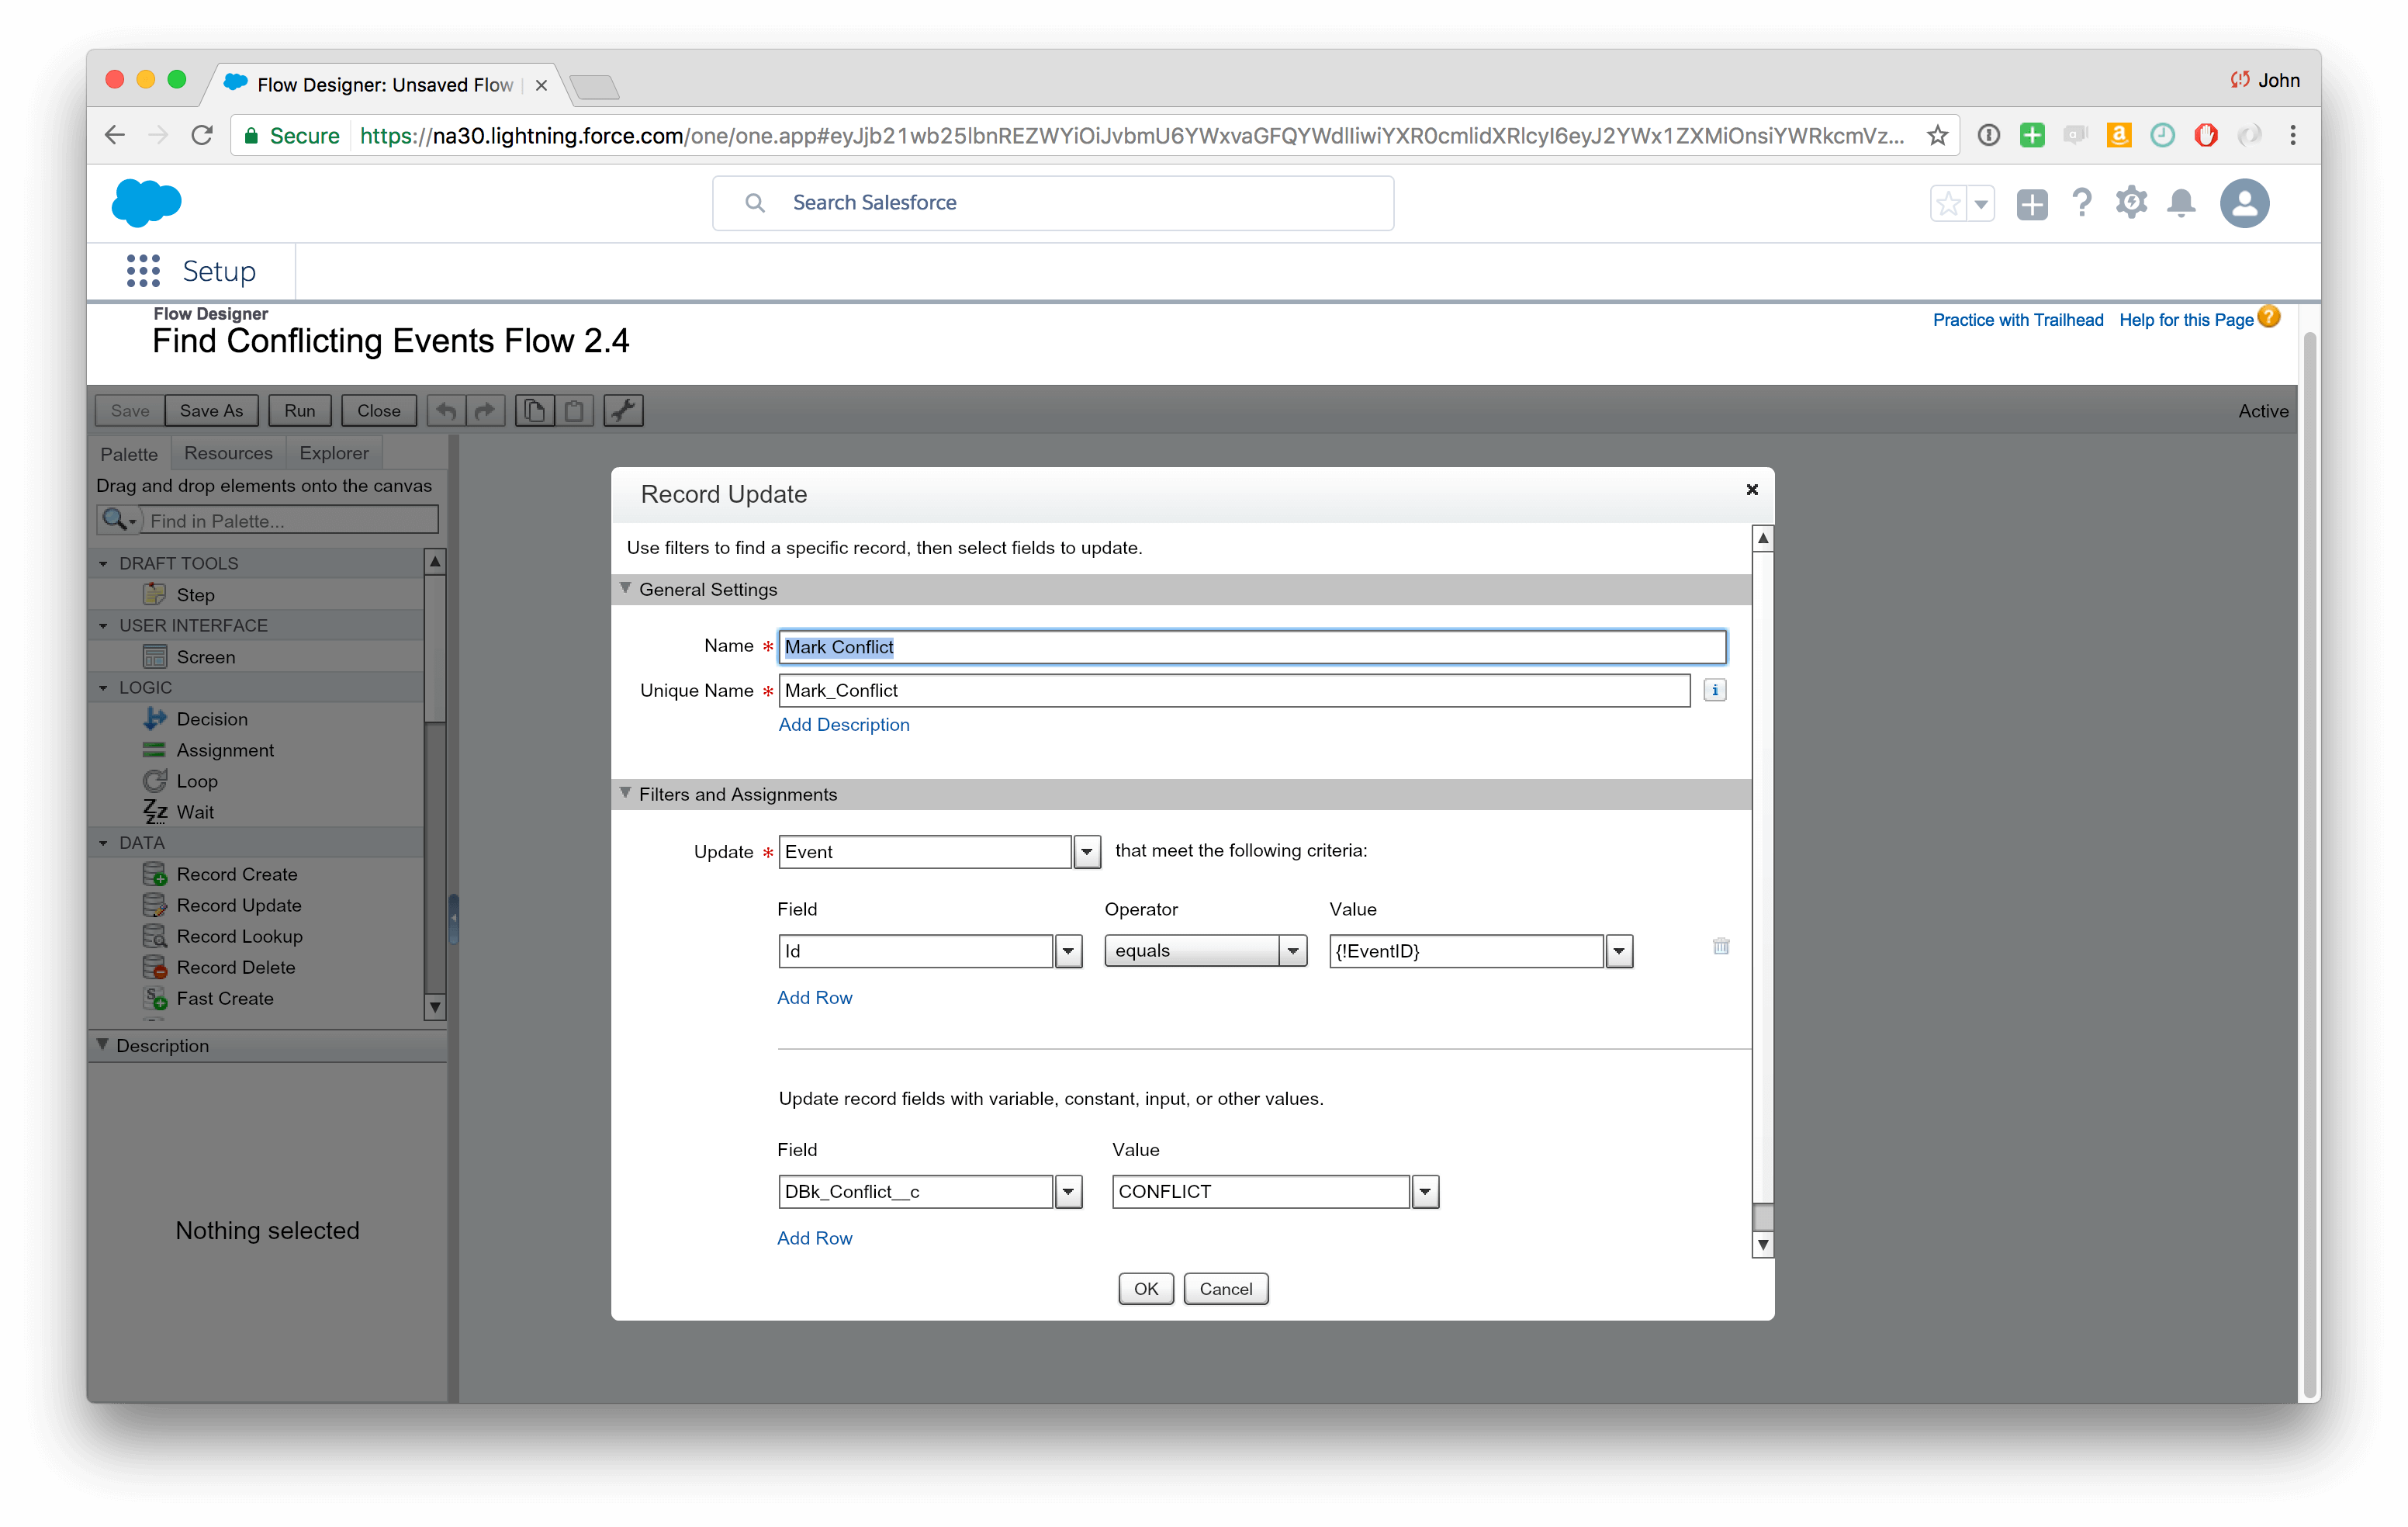
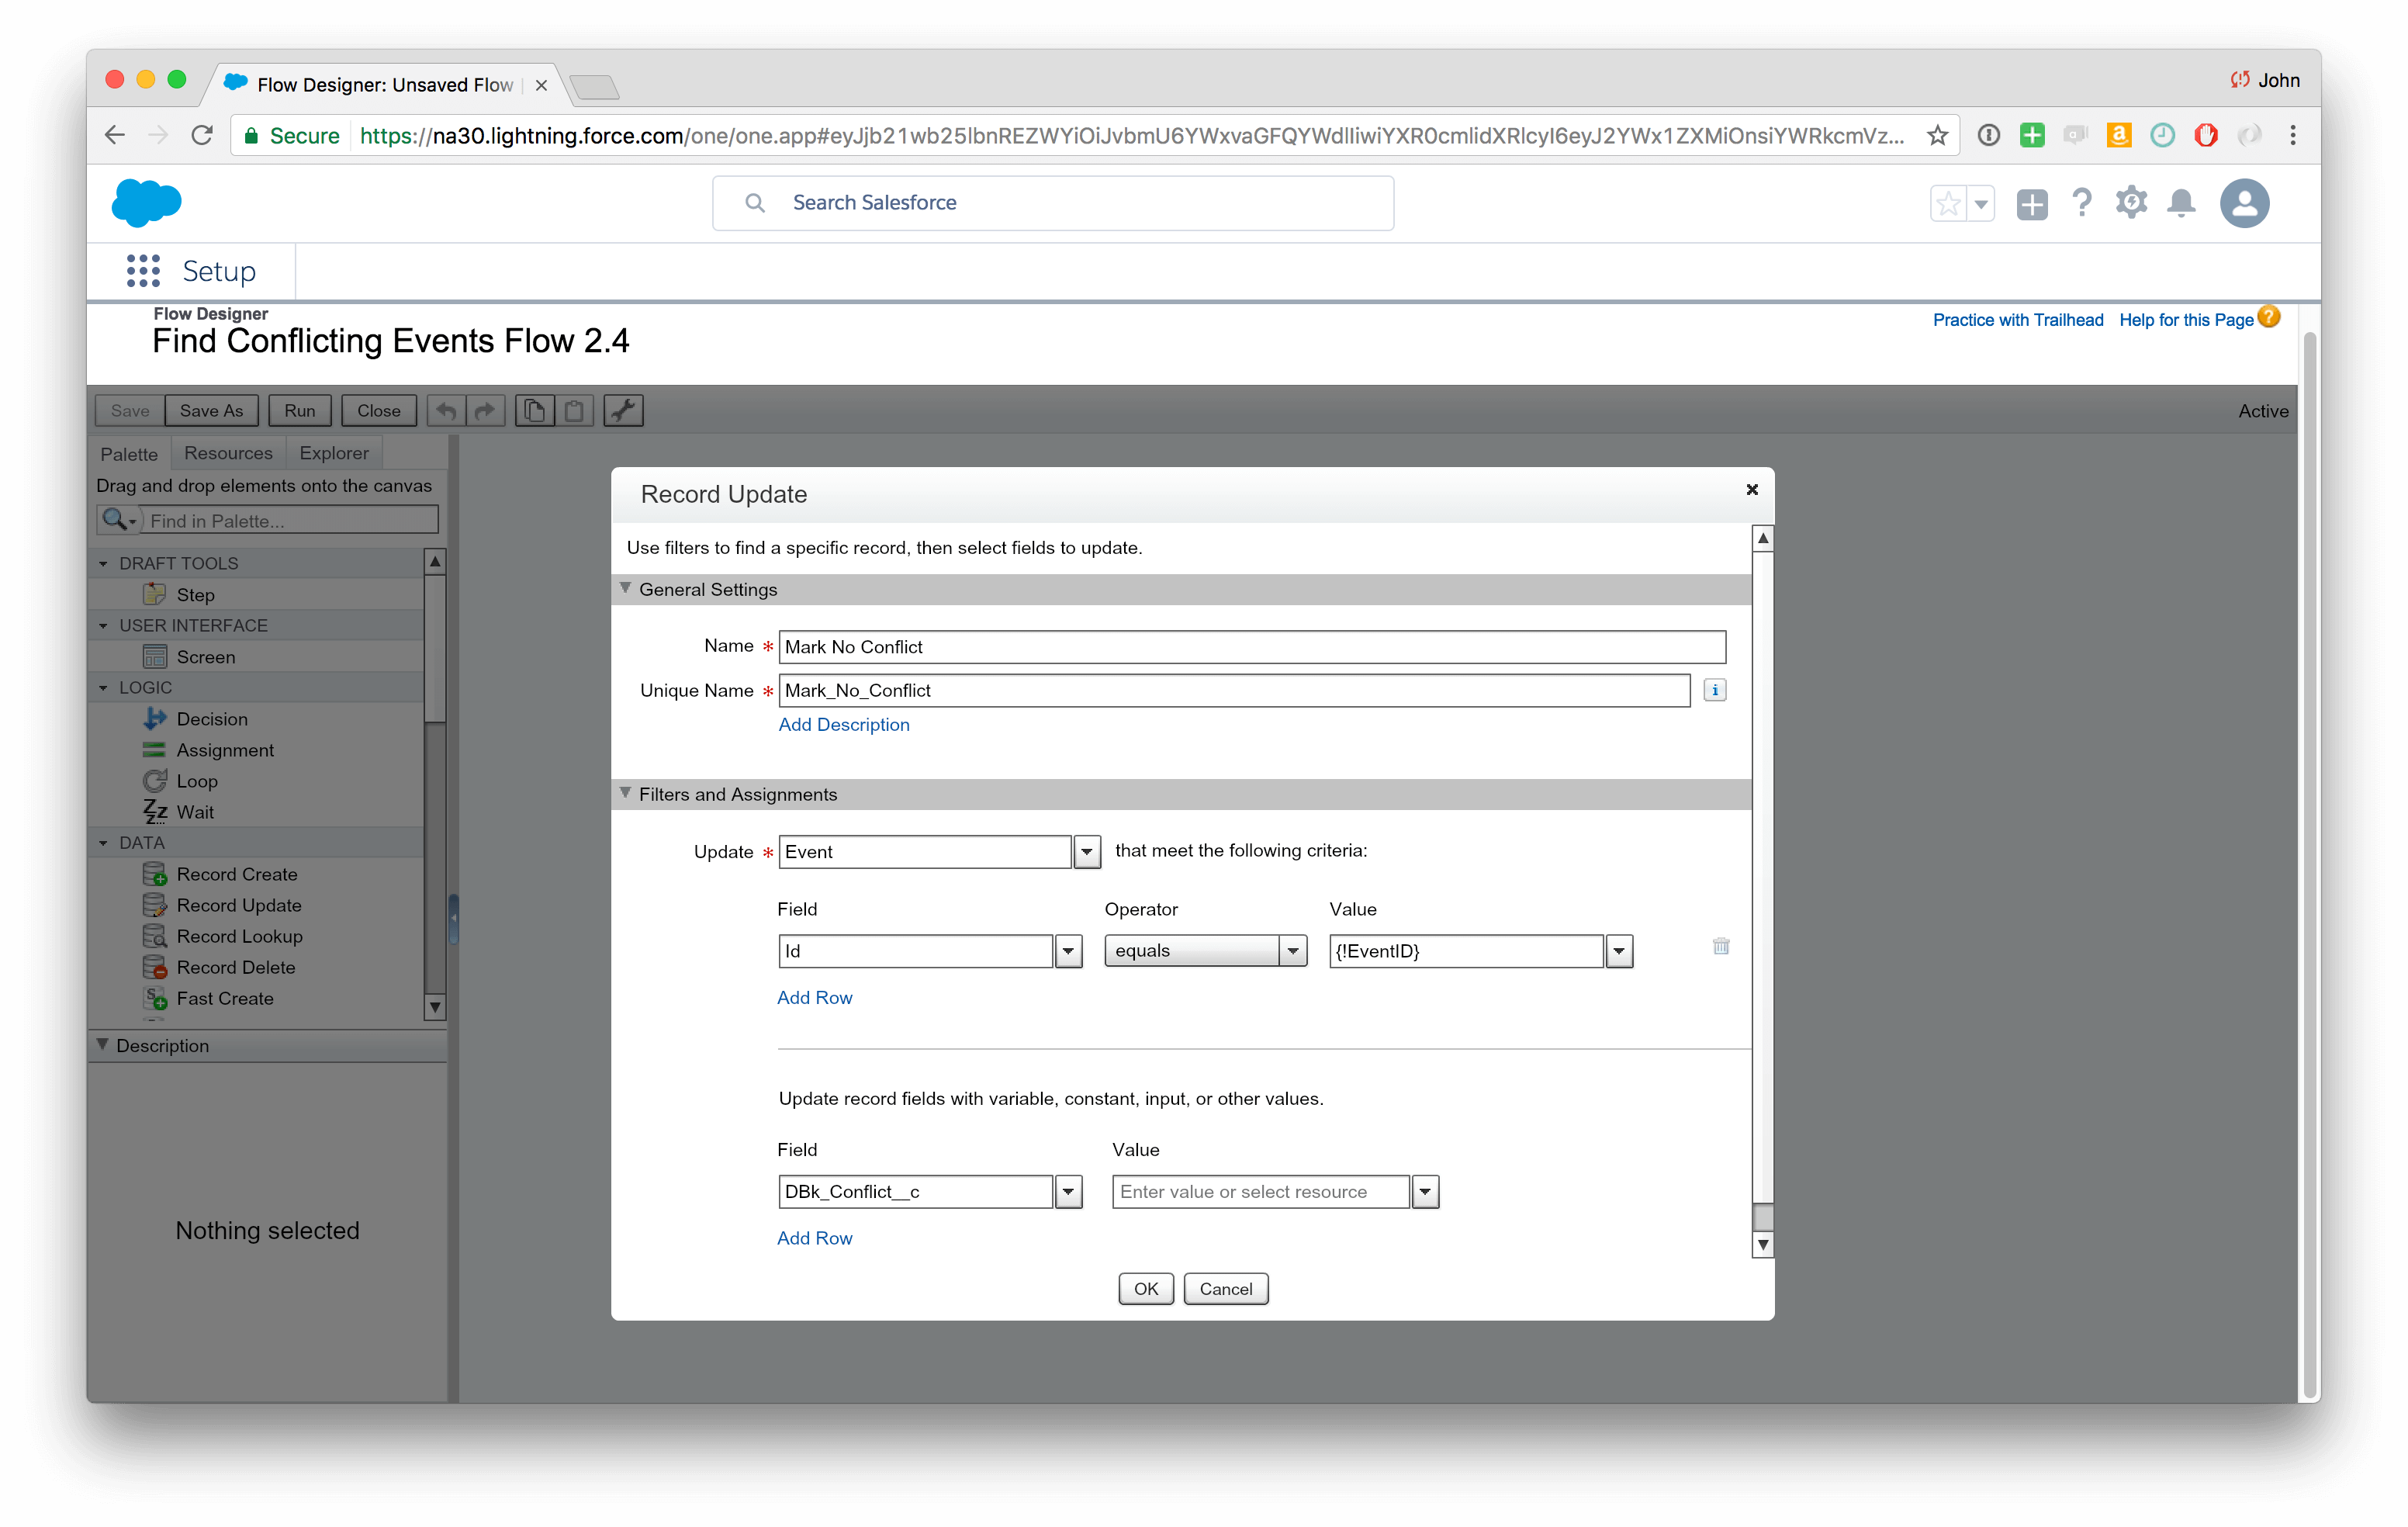
Finally, you’ll drag two “Record Update” objects on to the flow. The one for your “yes” outcome will mark the record as a conflict, the one for your default outcome will clear the conflict field in the event.
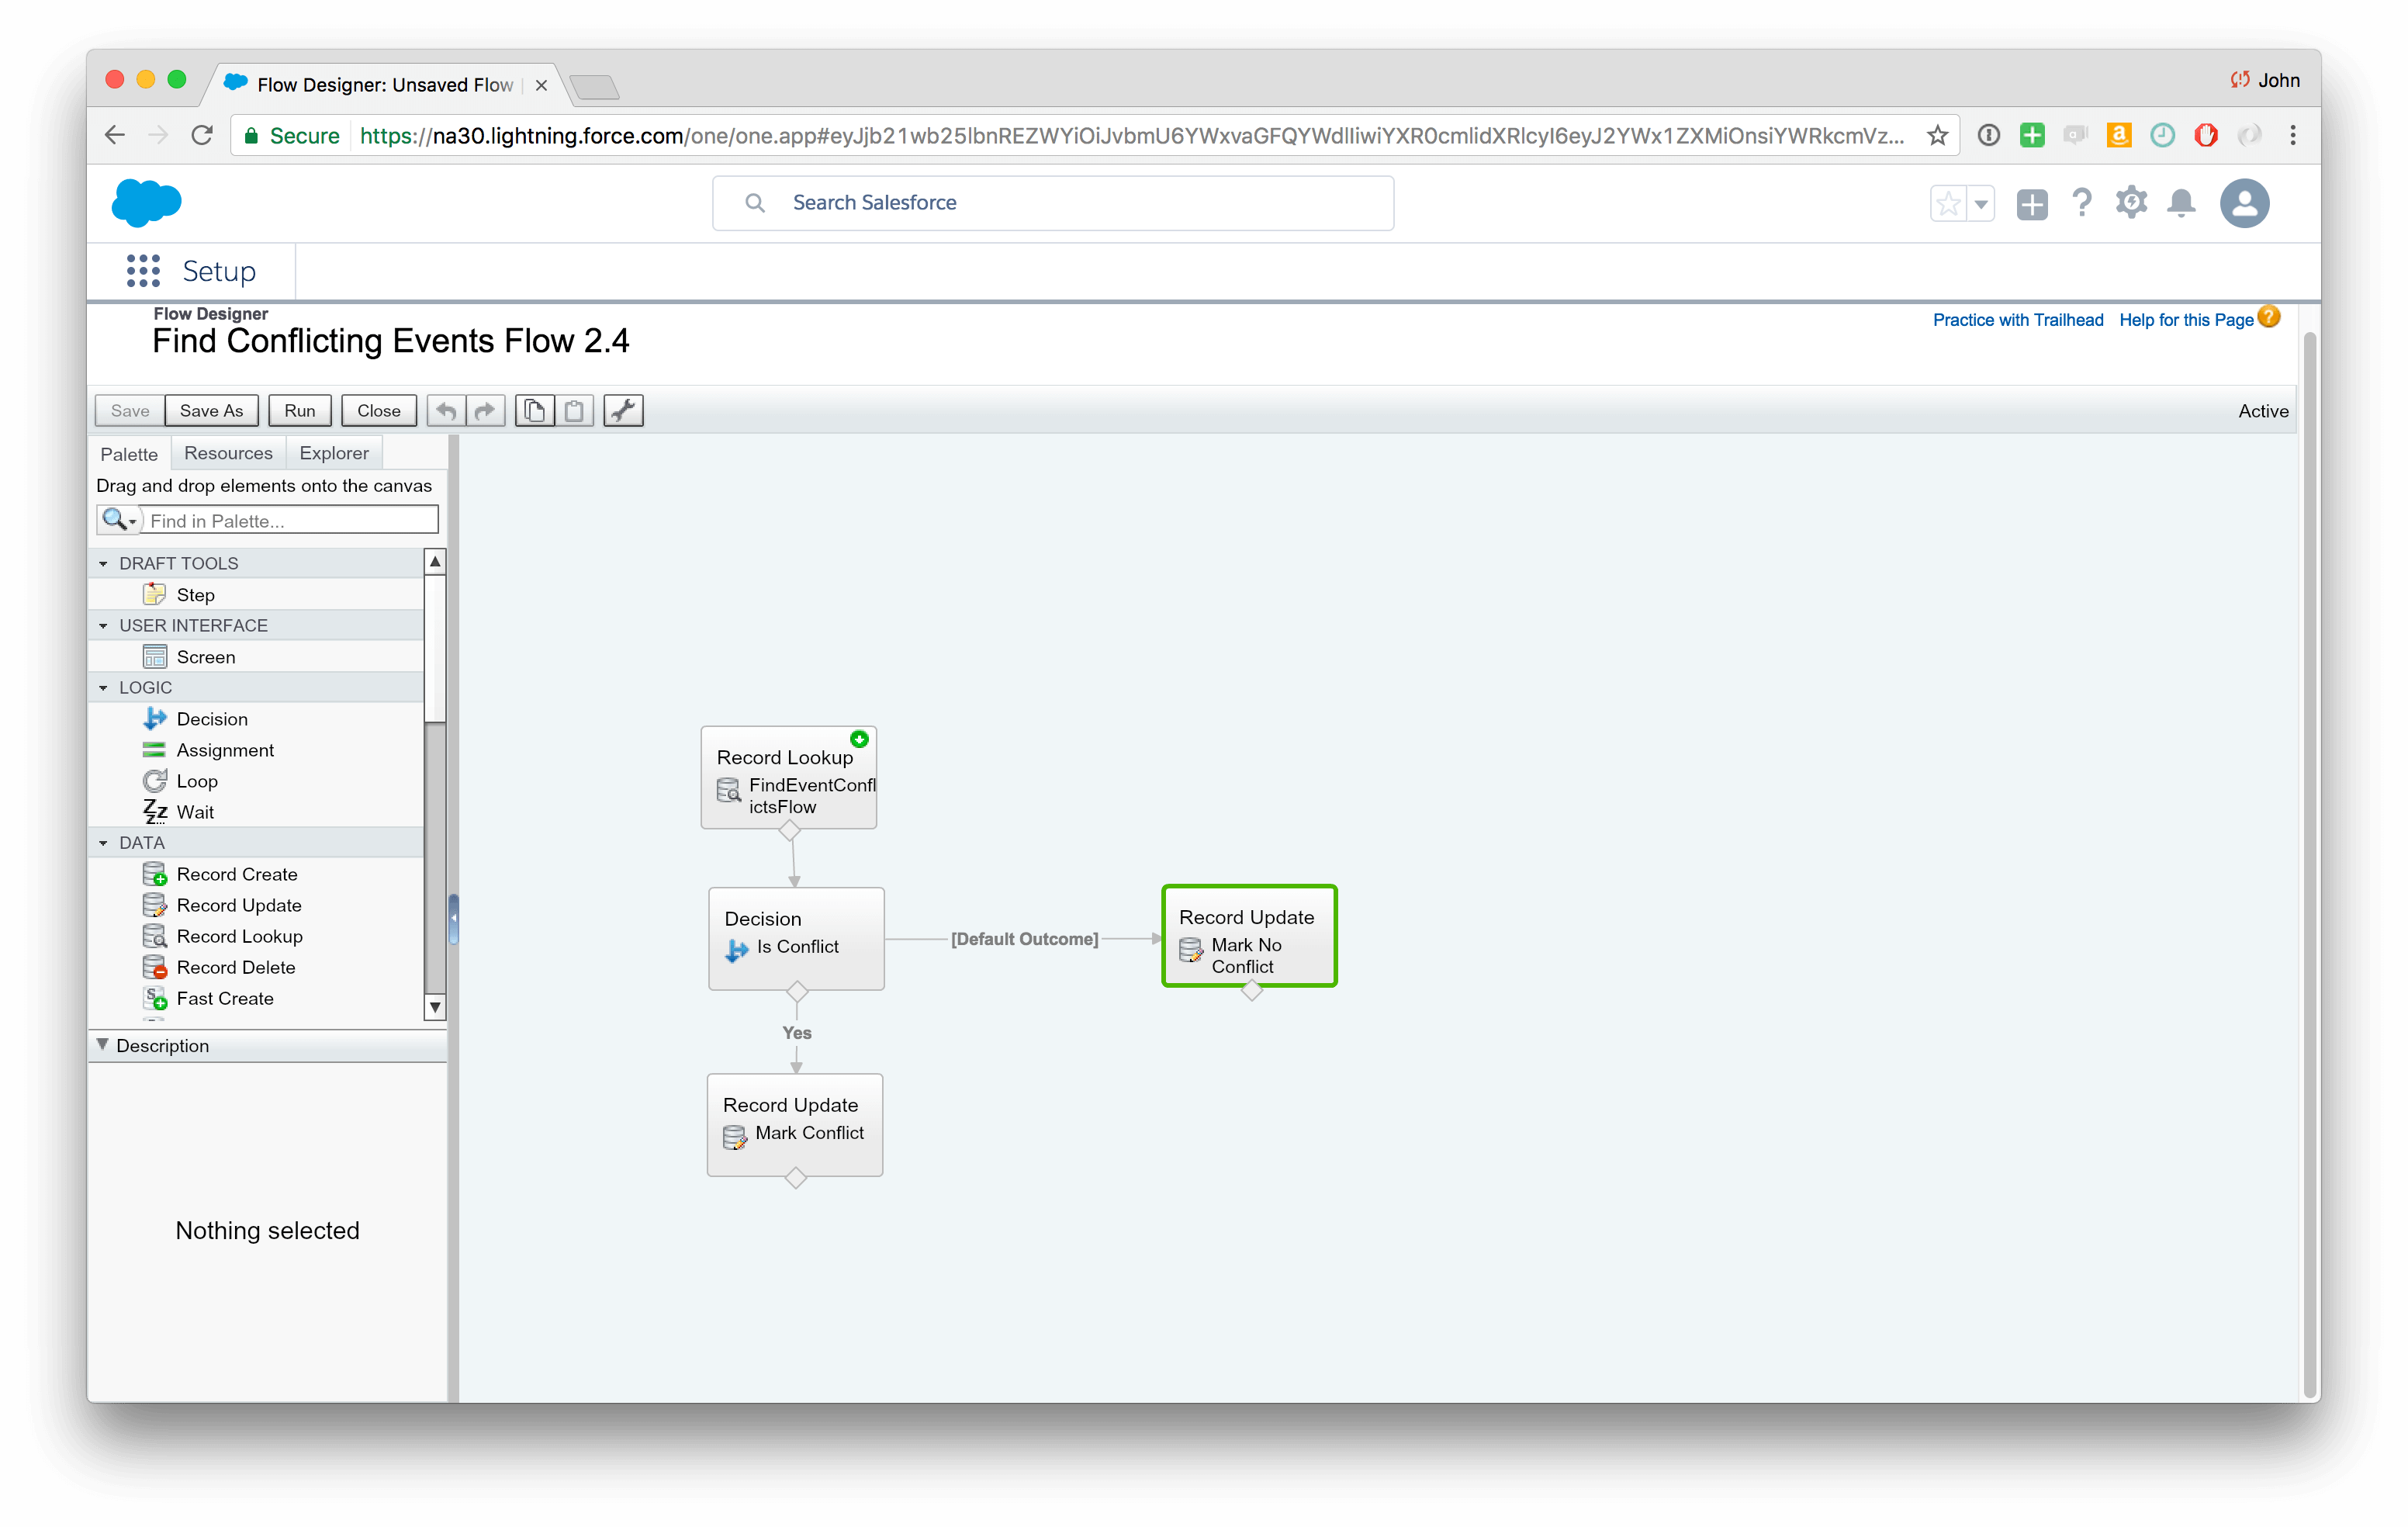
When you’re all done you’re flow will look like this:
5. Activate the Process and the Flow: you’re done
Activate your Process along with the Flow you just created and you’re all set. Records will get the word “CONFLICT” added to a new field when they overlap with other records in time.
Date Range Conflicts in Salesforce – Method 2
Using a Trigger
Doing this with a trigger is supposed to be harder because you have to write some Apex, but I think that it’s simpler because there are fewer moving parts: just one trigger instead of multi-part processes and flows. Besides, we’ve written the Apex for you, so all you’ll need to do is tweak it if you’re looking for conflicts in an object other than Events.
The other advantage of this method is that field validation warnings show up at the end of the trigger, so your users will get a nice warning when they create conflicting events.
1. Create a new (hidden) field
You’ll eventually use field validation to alert the user to a conflict, so begin by creating the field that will be edited (and will thus fail validation) when there is a conflict.
In this example we’ll be looking for conflicts in the Event object, so create a new text field in Event (or in your object). This field need not show up on any page layouts.
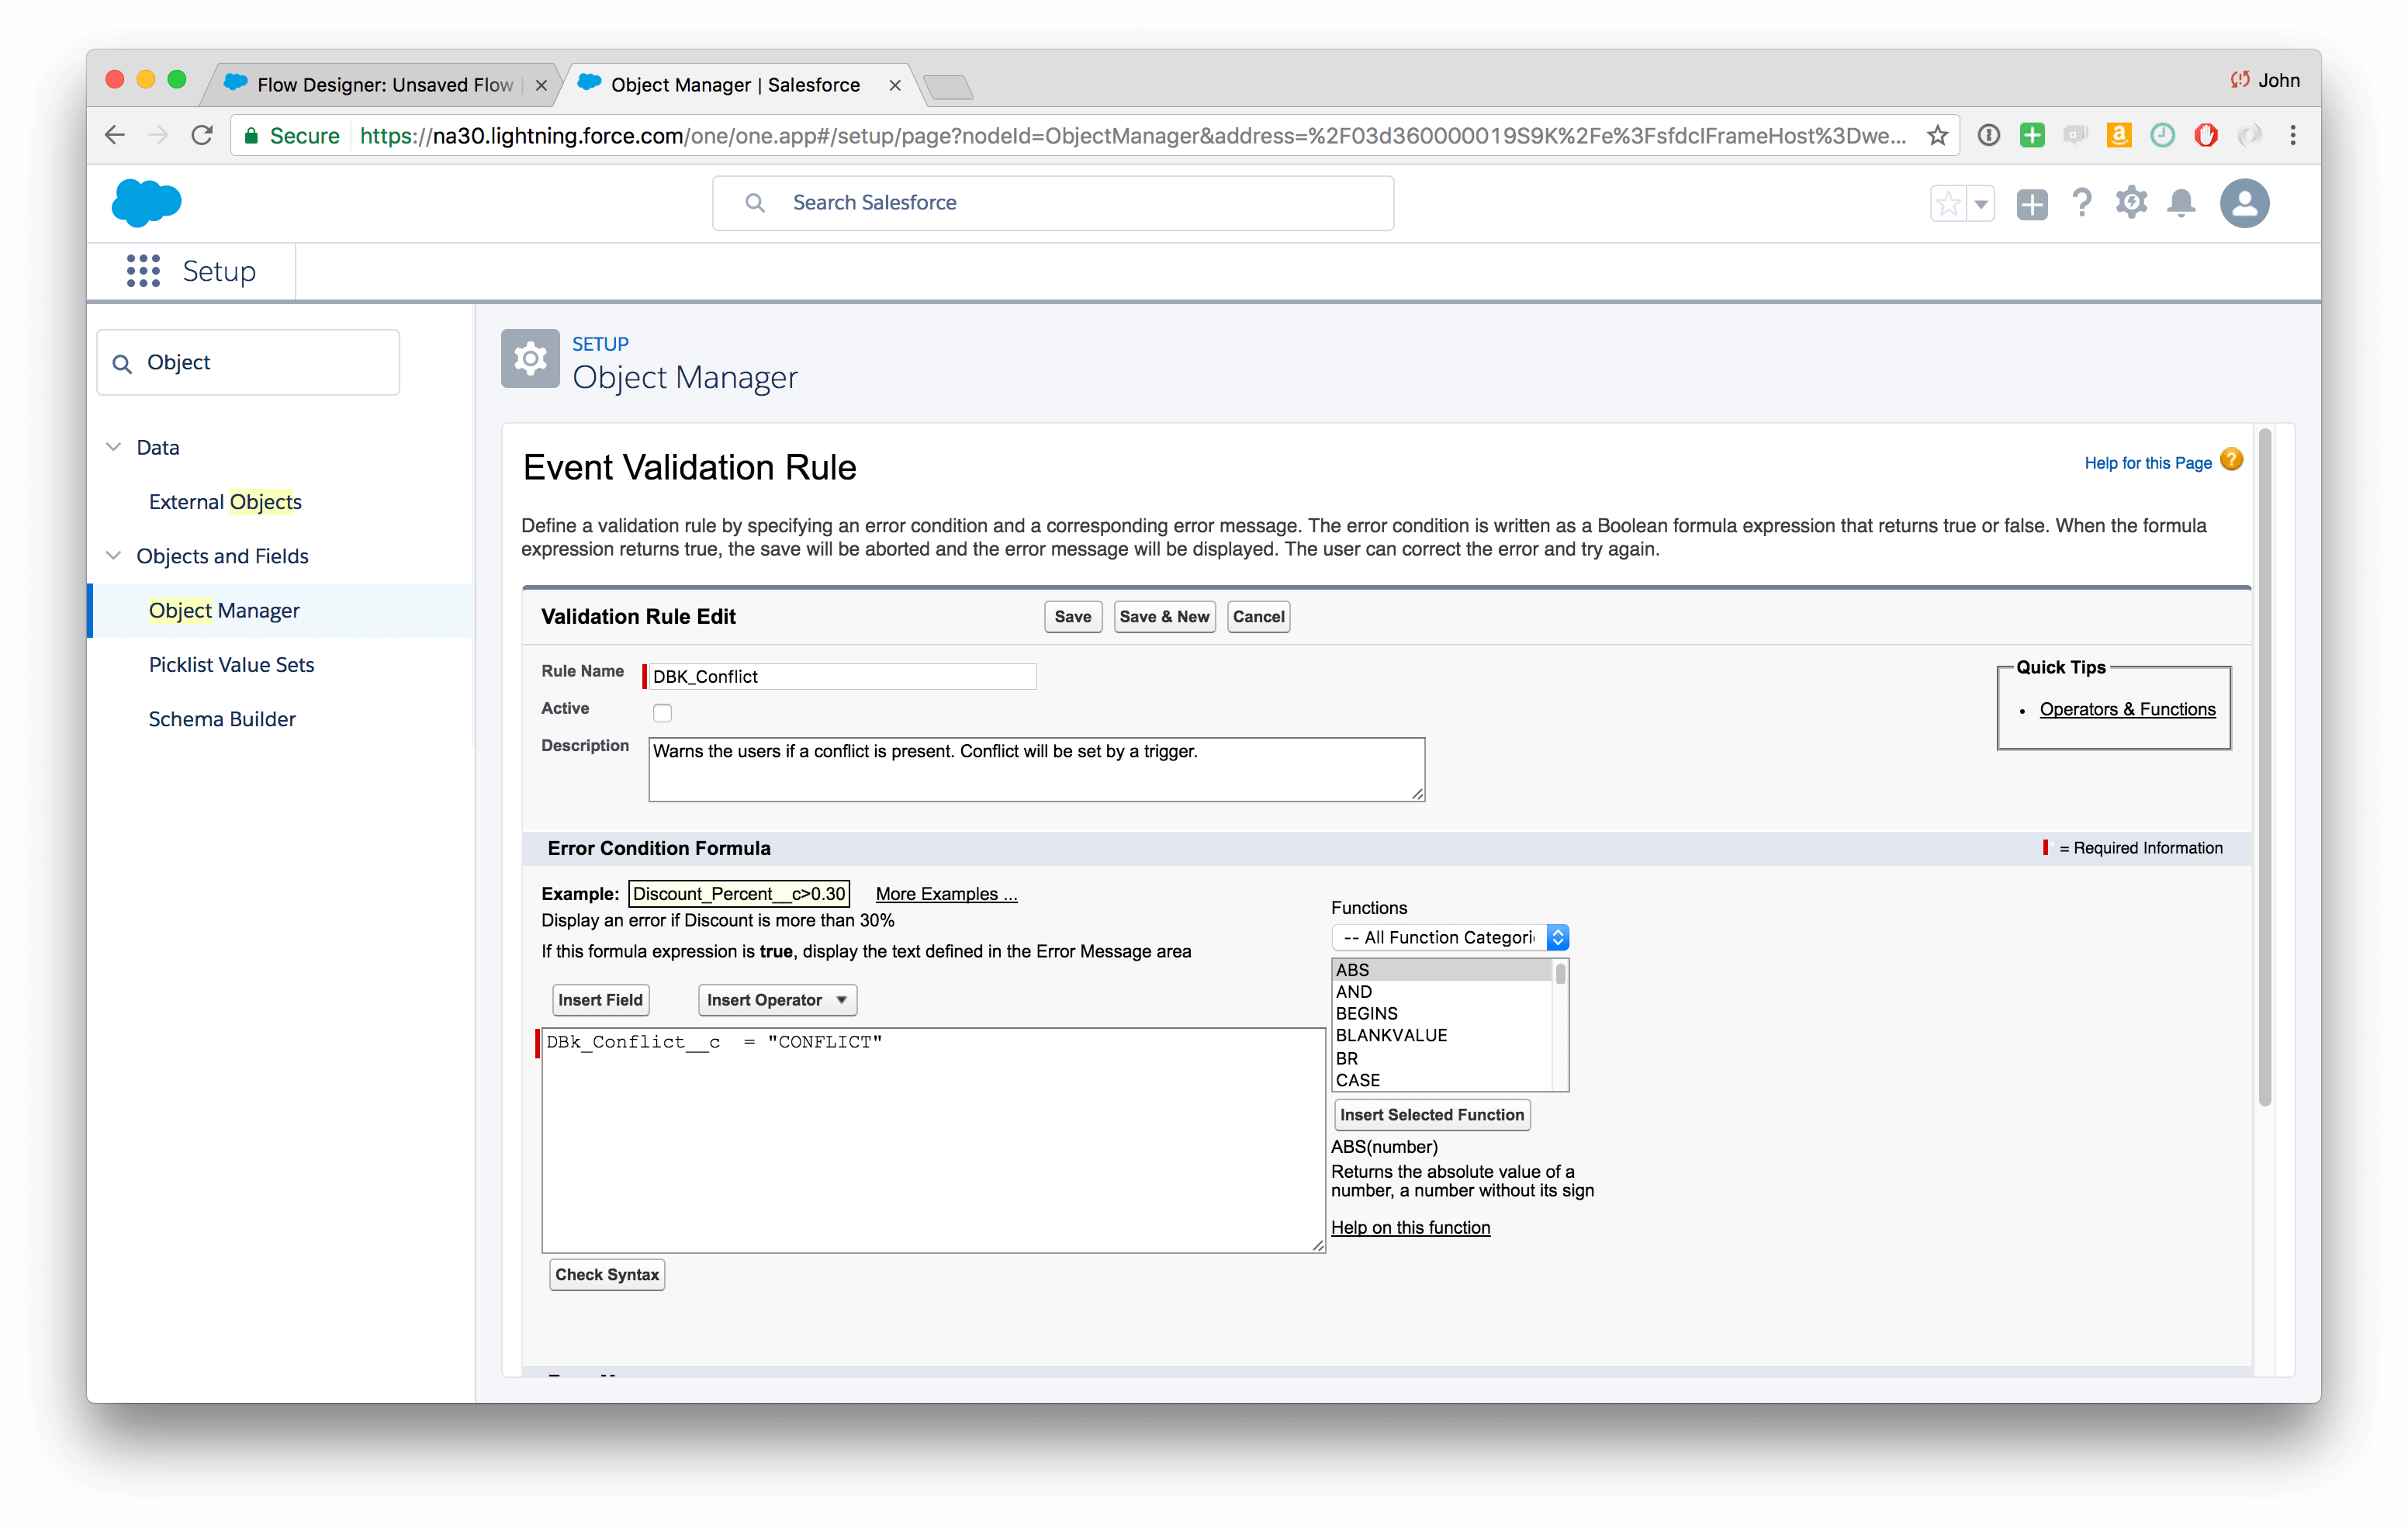
2. Create a new validation rule
From the Object Manager, select “Event” and then click “Validation Rules” at the top of the screen. Click “New” to create a new rule:
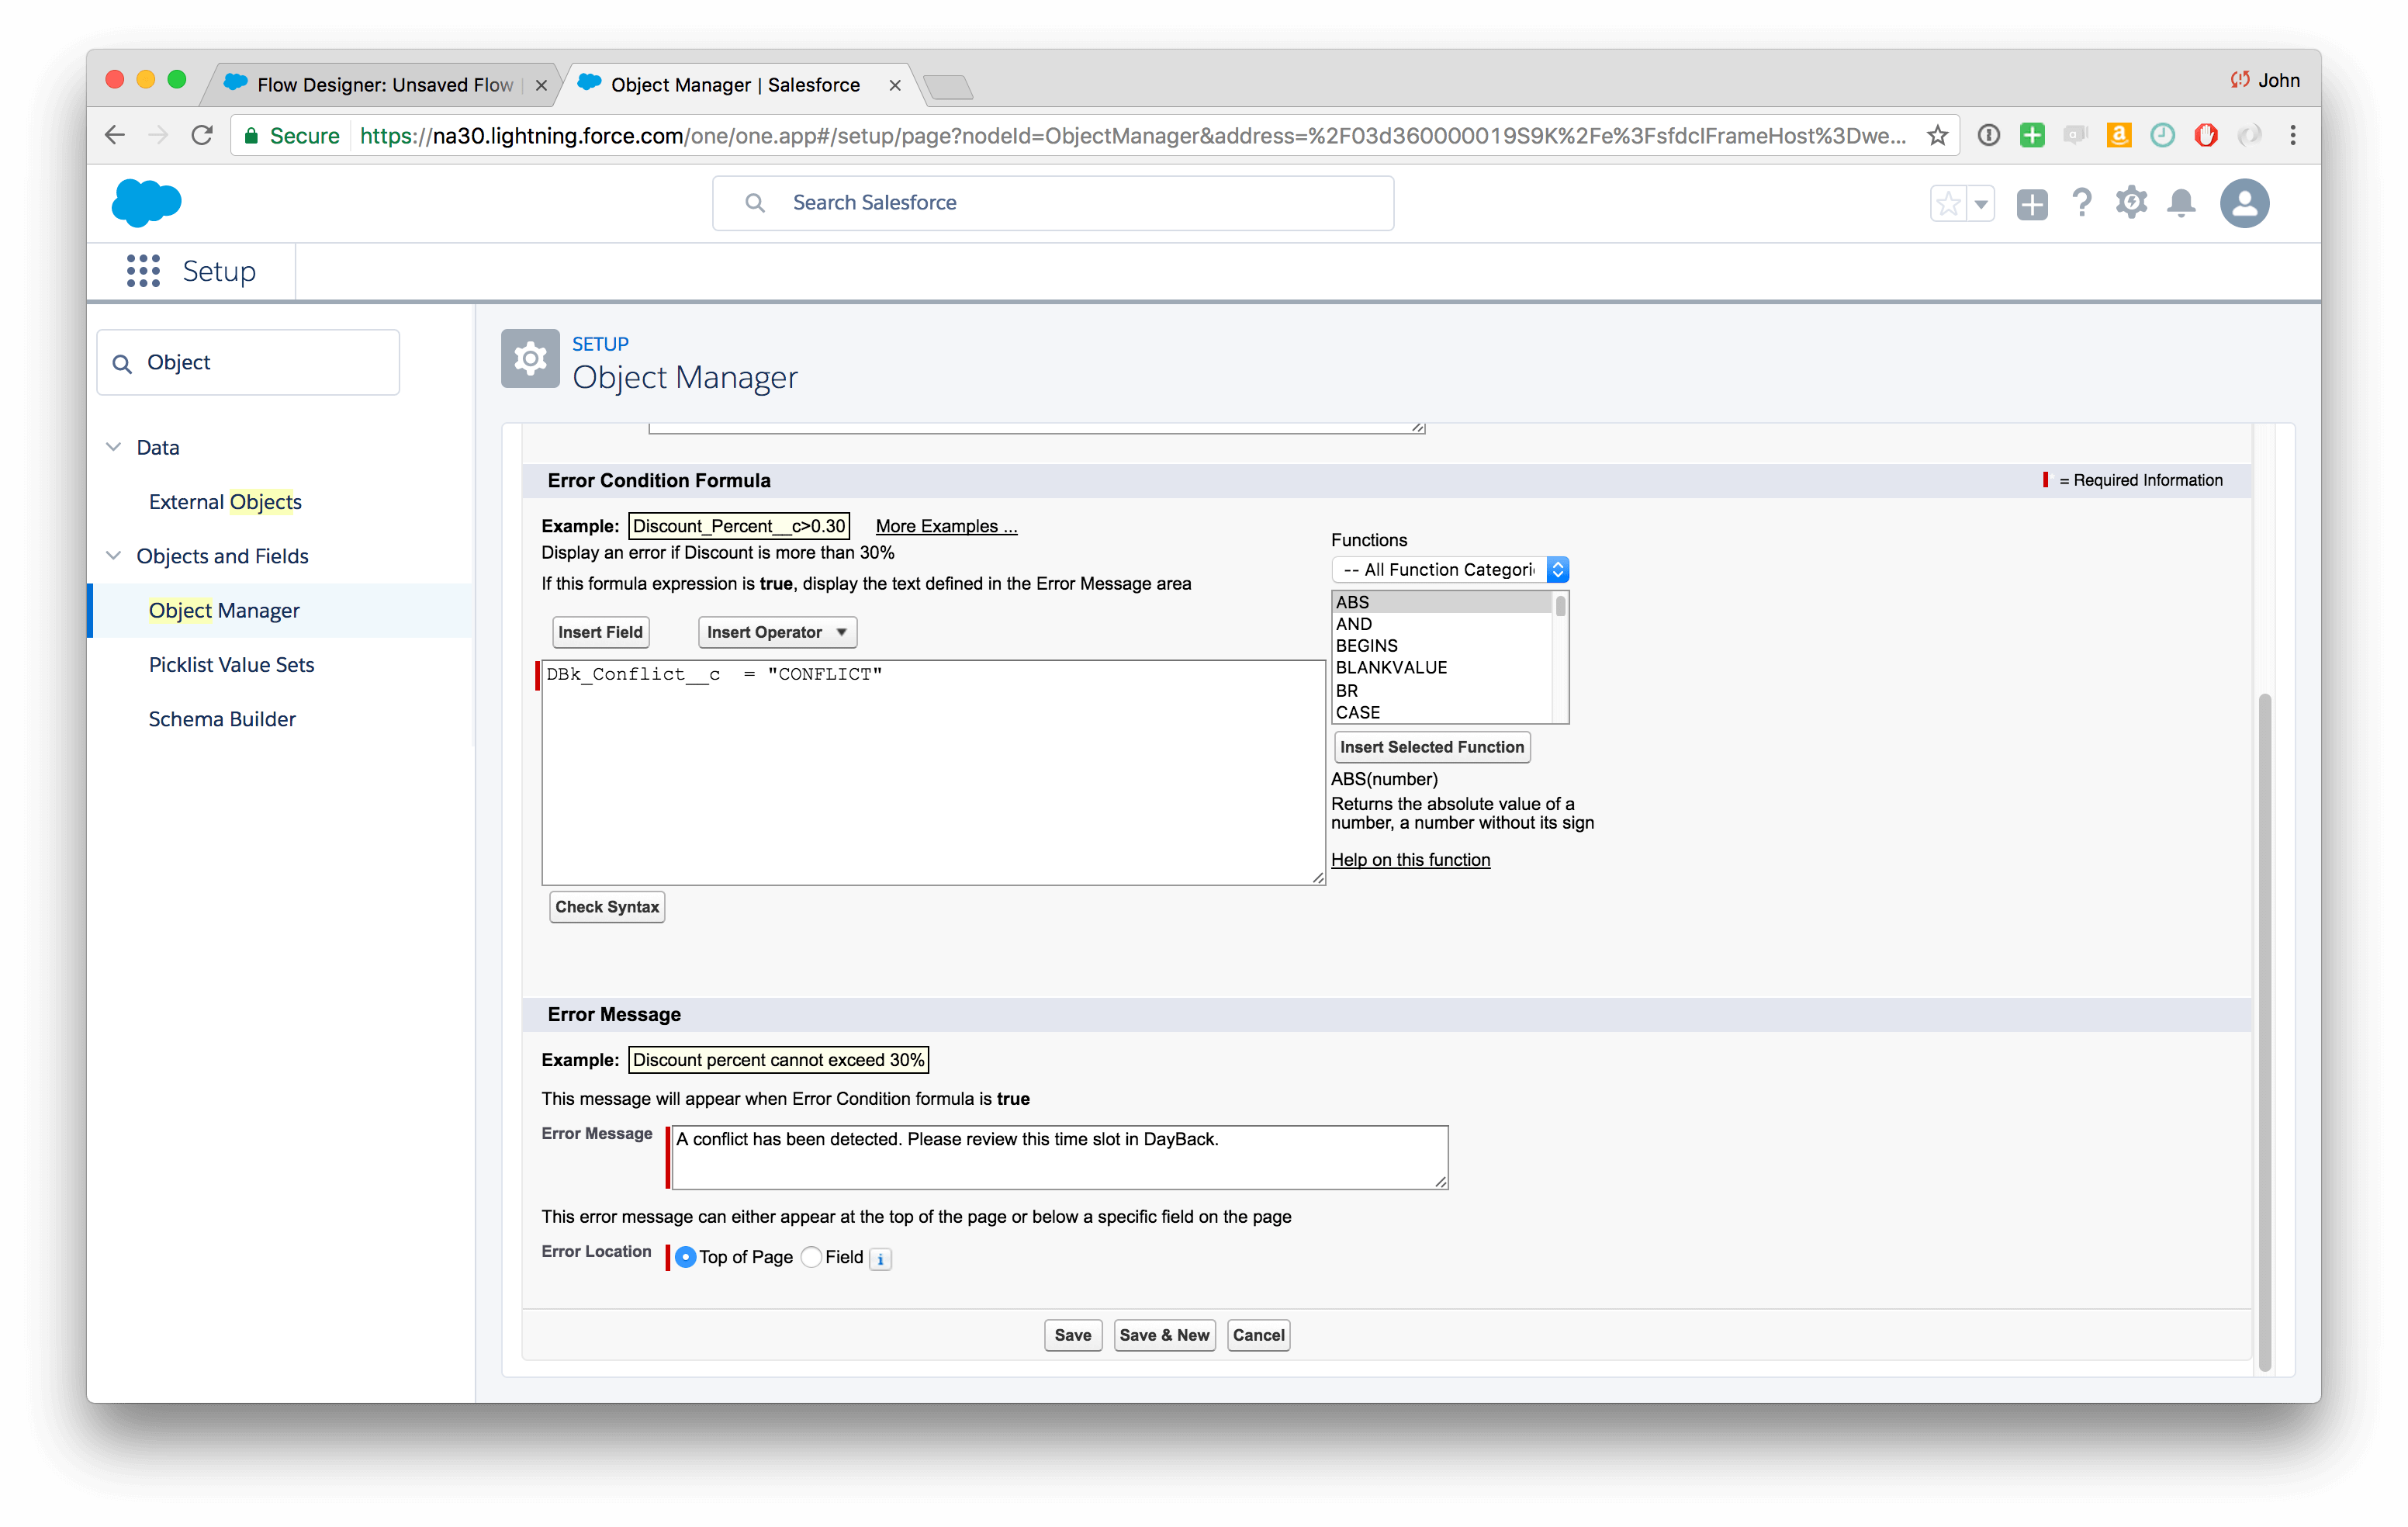
Scroll down to create the error message users will see when they create a conflict:
Mark your rule “active” when you’re done. Don’t worry: it won’t do anything until your trigger starts modifying the custom DBk_Conflict field it’s based on.
3. Write your trigger
Search Setup Quick Find for “Apex Triggers”, select that and then click “Developer Console”. Close that “Open” floating window by clicking “x” in the upper right. Then, from the File menu in the console, select New / Apex Trigger. Give your trigger a name and select the Event object.
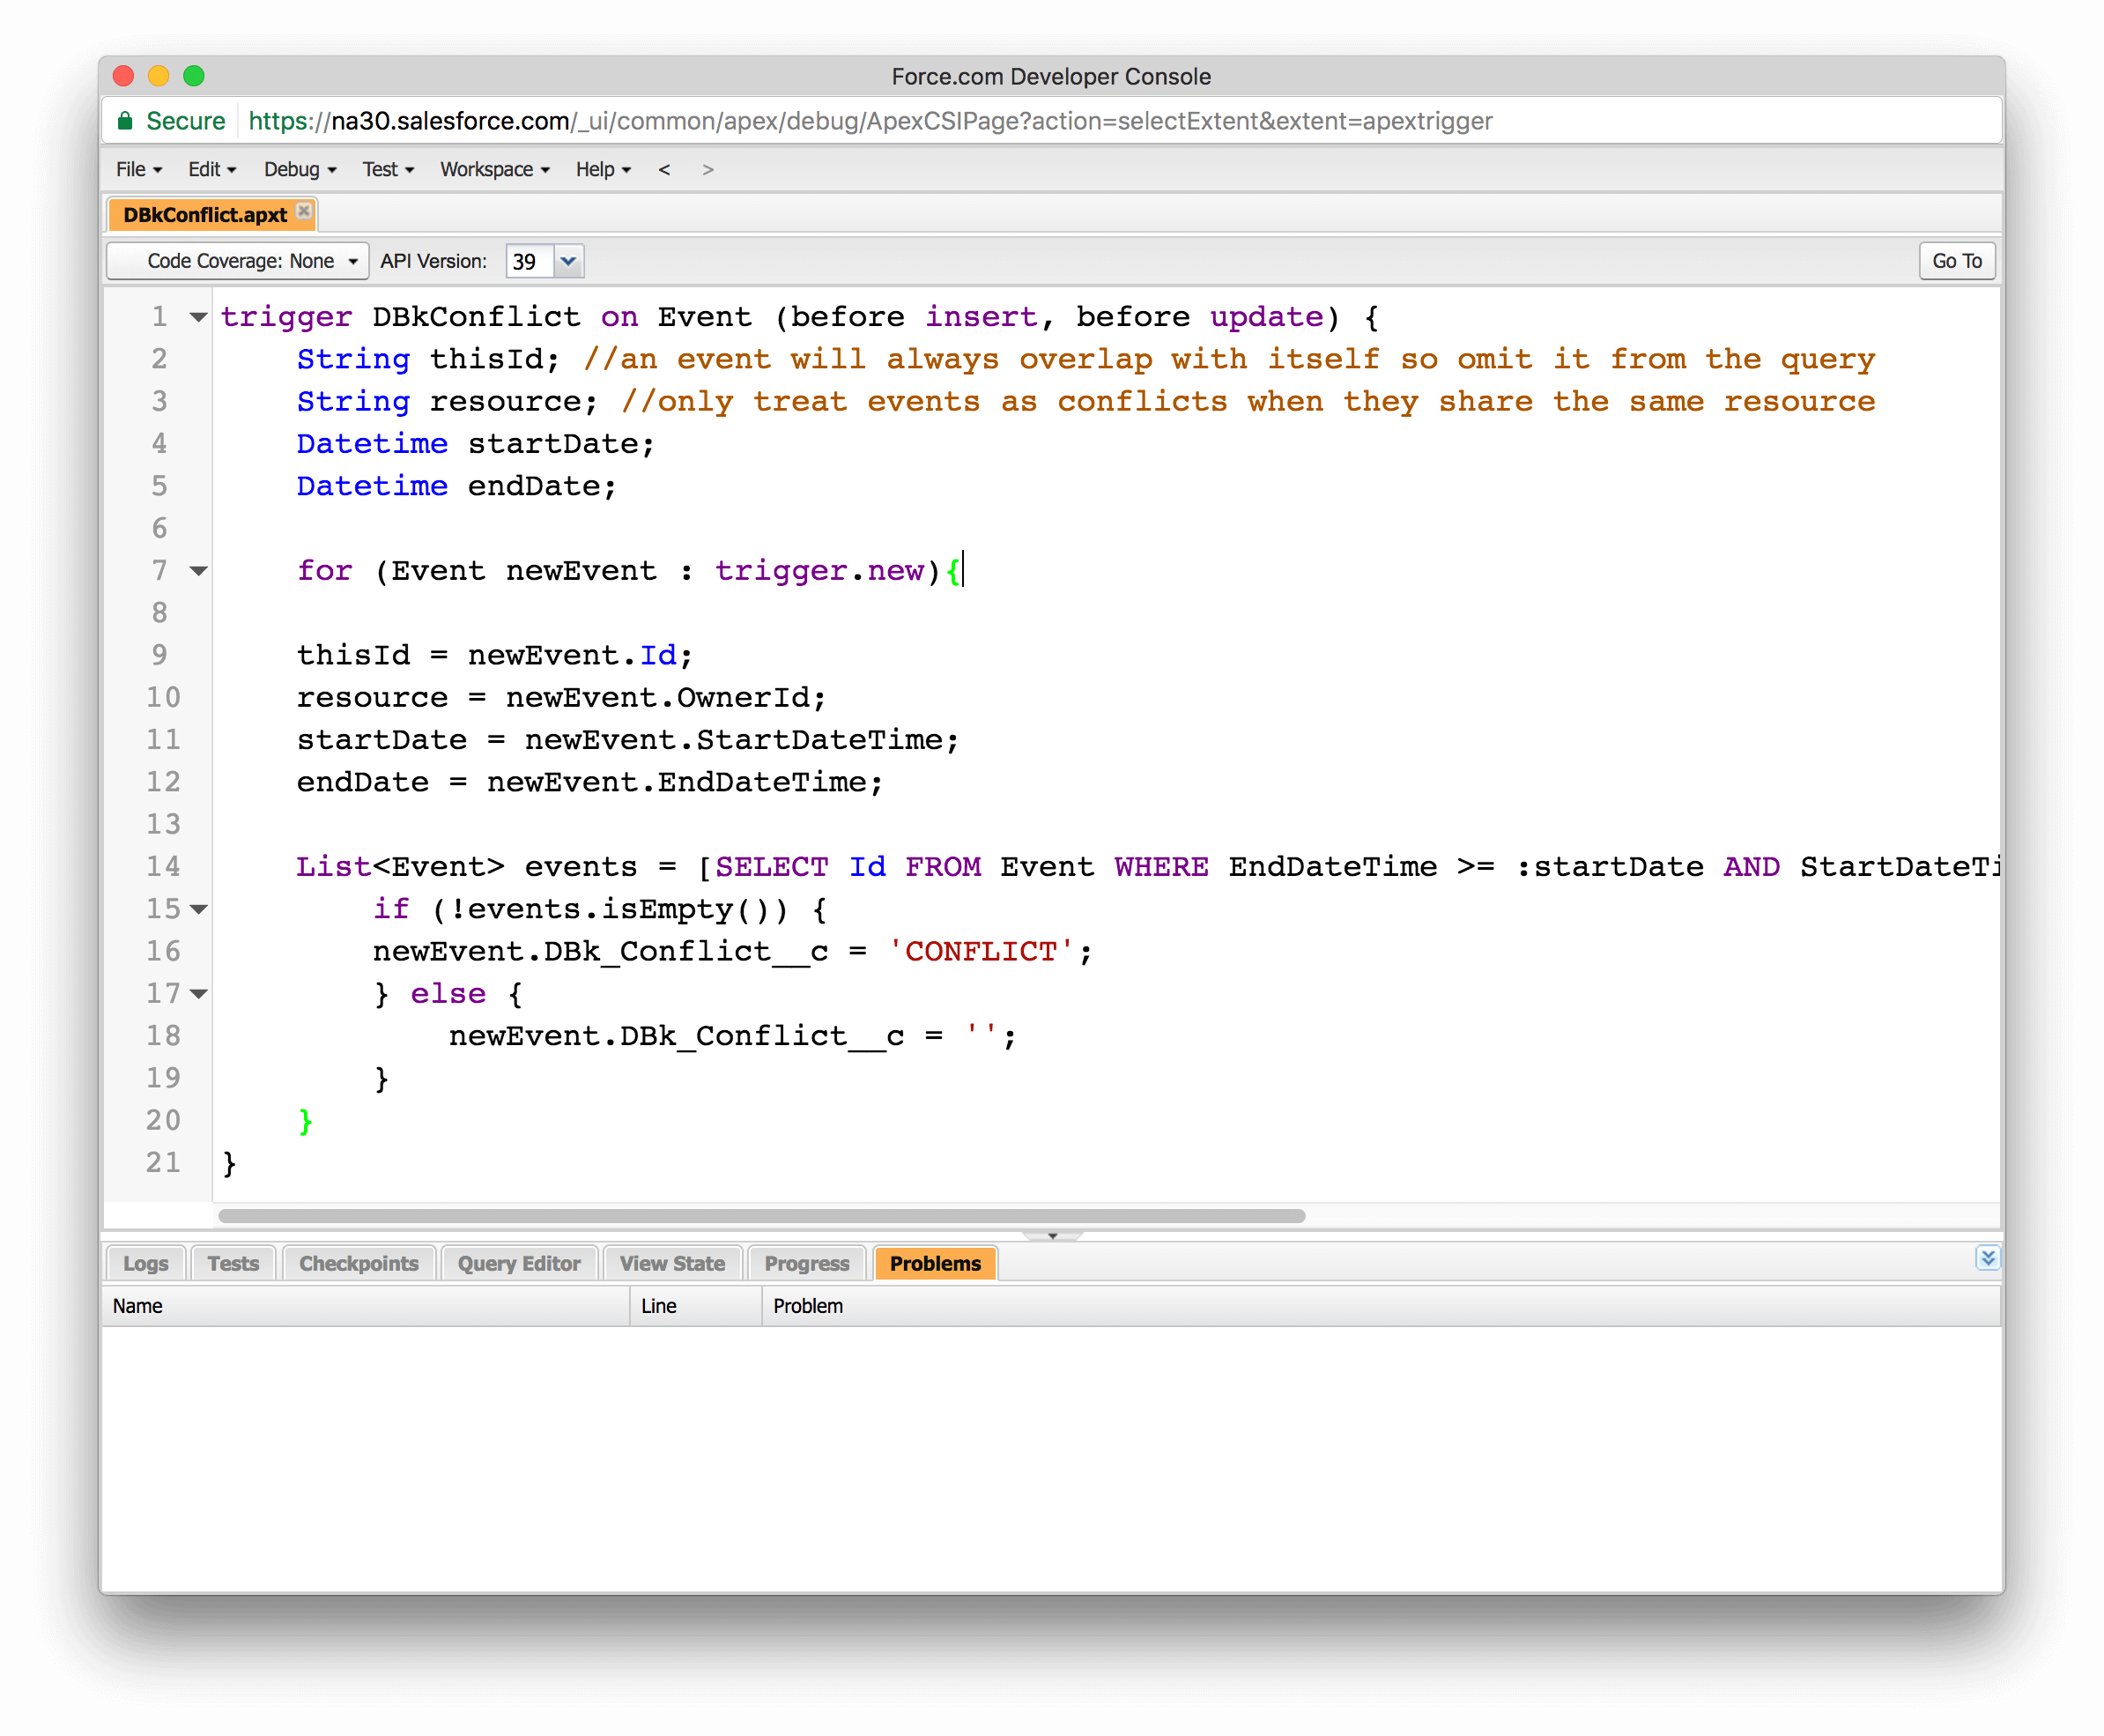
You’ll see some (very brief) sample code generated for you. Replace it with the code below so your trigger looks like the following screenshot. Notice how the query looks for events that both overlap AND share the same resource.
trigger DBkConflict on Event (before insert, before update) {
 String thisId; //an event will always overlap with itself so omit it from the query
 String resource; //only treat events as conflicts when they share the same resource
 Datetime startDate;
 Datetime endDate;

 for (Event newEvent : trigger.new){

 thisId = newEvent.Id;
 resource = newEvent.OwnerId;
 startDate = newEvent.StartDateTime;
 endDate = newEvent.EndDateTime;

 List<Event> events = [SELECT Id FROM Event WHERE EndDateTime >= :startDate AND StartDateTime <= :endDate AND OwnerId = :resource AND ID != :thisId];
 if (!events.isEmpty()) {
 newEvent.DBk_Conflict__c = 'CONFLICT';
 } else {
 newEvent.DBk_Conflict__c = '';
 }
 }
}
Select File / Save and save your trigger. =)
To deploy the trigger into production you’ll need to include a test class. The following code will give you a 100% code coverage.
@isTest
private class TestDBkConflict {

    private testMethod static void DBkConflictTest() {

        //create first event, no conflict
        Event firstEvent = new Event();
        firstEvent.StartDateTime = dateTime.newInstance(1984,1,1,12,0,0);
        firstEvent.EndDateTime = dateTime.newInstance(1984,1,1,13,0,0);
        firstEvent.Subject = 'First Test Event';
        insert firstEvent;

        //create second event, conflict
        Event secondEvent = new Event();
        secondEvent.StartDateTime = dateTime.newInstance(1984,1,1,12,30,0);
        secondEvent.EndDateTime = dateTime.newInstance(1984,1,1,13,0,0);
        secondEvent.Subject = 'Second Test Event';
        insert secondEvent;
        List<Event> events = [SELECT DBk_Conflict__c FROM Event WHERE ID = :secondEvent.Id];
        System.assert(events[0].DBk_Conflict__c=='CONFLICT', 'DBk_Conflict should read "CONFLICT"');

    }

}
4. Activate your trigger
Make sure your trigger and your validation rule are both set to “active” and you’ve just added conflict checking to Salesforce. Congratulations! Here’s a quick video of what the trigger method looks like in DayBack:
Want to extend this in your own Salesforce deployment? Get in touch; we’re here to help.
I like this,
I’m curious if there is anyway to visually display or hide, events that are “show me as ” busy or Out of Office or Free.
Additionally, it would be great to put in event color validations based on the a field or some logic to help schedulers visualize (for example, events with a picklist value = X will be RED on the calendar to help agents and scheduling agents differentiate different types of events.
Hi Marcus,
Glad this looks useful.
Hiding events that are “busy” etc can be done in filters, providing you’ve mapped that field to something like “status” in DayBack. Another approach would be to use Record Types and filter your source by record type when you’re configuring that source in DayBack (step 8 here: http://salesforce_docs.dayback.com/article/35-custom-objects-sources).
Color is similar: you can map the status in DayBack to a formula field that returns a certain value if your picklist value = X, and the select red for that status value. You’ll find some notes on coloring by formula here: http://salesforce_docs.dayback.com/article/21-event-colors#formula
Hope that helps,
John
Are there steps missing from the Process Builder/Flows method? I followed the instructions and it doesn’t seem to be working.
I don’t think there are any steps missing, but there are a number of places where you can elect not to make something active. =( If it’s still not working email us at support@dayback.com and we’ll ask if we can take a look. The trigger method seems like a nicer user experience, I’d be interested to know what advantages you see to using a flow?
Any thoughts on doing the reverse. am trying to build an online booking system using Dayback as the admin “back end”.
We have events that are available to be “booked” (ie available time slots) If an appointment is booked then status changes to no longer available and that slot no longer appears on web form. But for example, if someone schedules a meeting that conflicts with the original available slot. then I want the original meeting to be flagged as “in conflict” – so it no longer appears on the booking page – until the conflict is sorted. Rather than marking the new meeting as in conflict – actually would be good to flag both of them.
Hi Greg,
Yes, this should be doable, and I’ll follow up with you directly.
The basic operation would be to loop through the list of events created from the SOQL. Iterate through them with a for loop and update their status accordingly, and then update the list. Something like:
for(Event event : events) {
event.status__c = ‘in conflict’;
}
update events;
Cheers!
Soql inside for loop is bad practice.it will exceed dml limits.