
Part 3 of 3 on creating attendees, invitations, and accepting invitations in DayBack.
In two previous articles, we looked at using DayBack to send Google notifications from any calendar and using DayBack to share events in Salesforce using the event’s Attendees relationship. In this article, we’re going to combine these two techniques and send Google email notifications to our Salesforce attendees consisting of Users and Contacts. You may want to review the previous two articles for more details on the specific techniques, but the code examples in this article are self-contained if you just want to dive in.
Need Help?
The instructions and example code that follows is designed to show you how this customization works and to let developers add this to their own deployments. If you’d rather we deploy this for you, we can customize this feature and add it to your DayBack as part of an implementation package. Just get in touch.
Why this technique?
Native Salesforce email notifications do exist in Salesforce Classic, but not in the Lighting Experience. Currently, Salesforce Lighting users must sync with either Microsoft or Google to send email notifications to an Event’s attendees. In the past, this was accomplished using Lighting Sync, but that’s in the process of being replaced by Einstein Activity Capture.
As was examined in the Google Notification article, DayBack can also sync between a Salesforce calendar and a Google calendar and have the related Google event handle the email notifications. This updating is all done within DayBack in real-time, so the editing of the Salesforce events needs to be done in DayBack to update Google and send notifications.

Setting up your org
For this example, two new custom fields need to be added to the Salesforce Event object. One is a text field for storing the Google event id. The other is a checkbox used for telling DayBack to update the event if only attendee information has been edited, since those edits are in a related object. You can name them anything, but this example used the names Google Event Id and Update Notifications. Once you’ve added them to your Salesforce object add them as additional fields in DayBack’s calendar set-up for Events and make note of their Ids for Calendar Actions.
Creating a Google Calendar
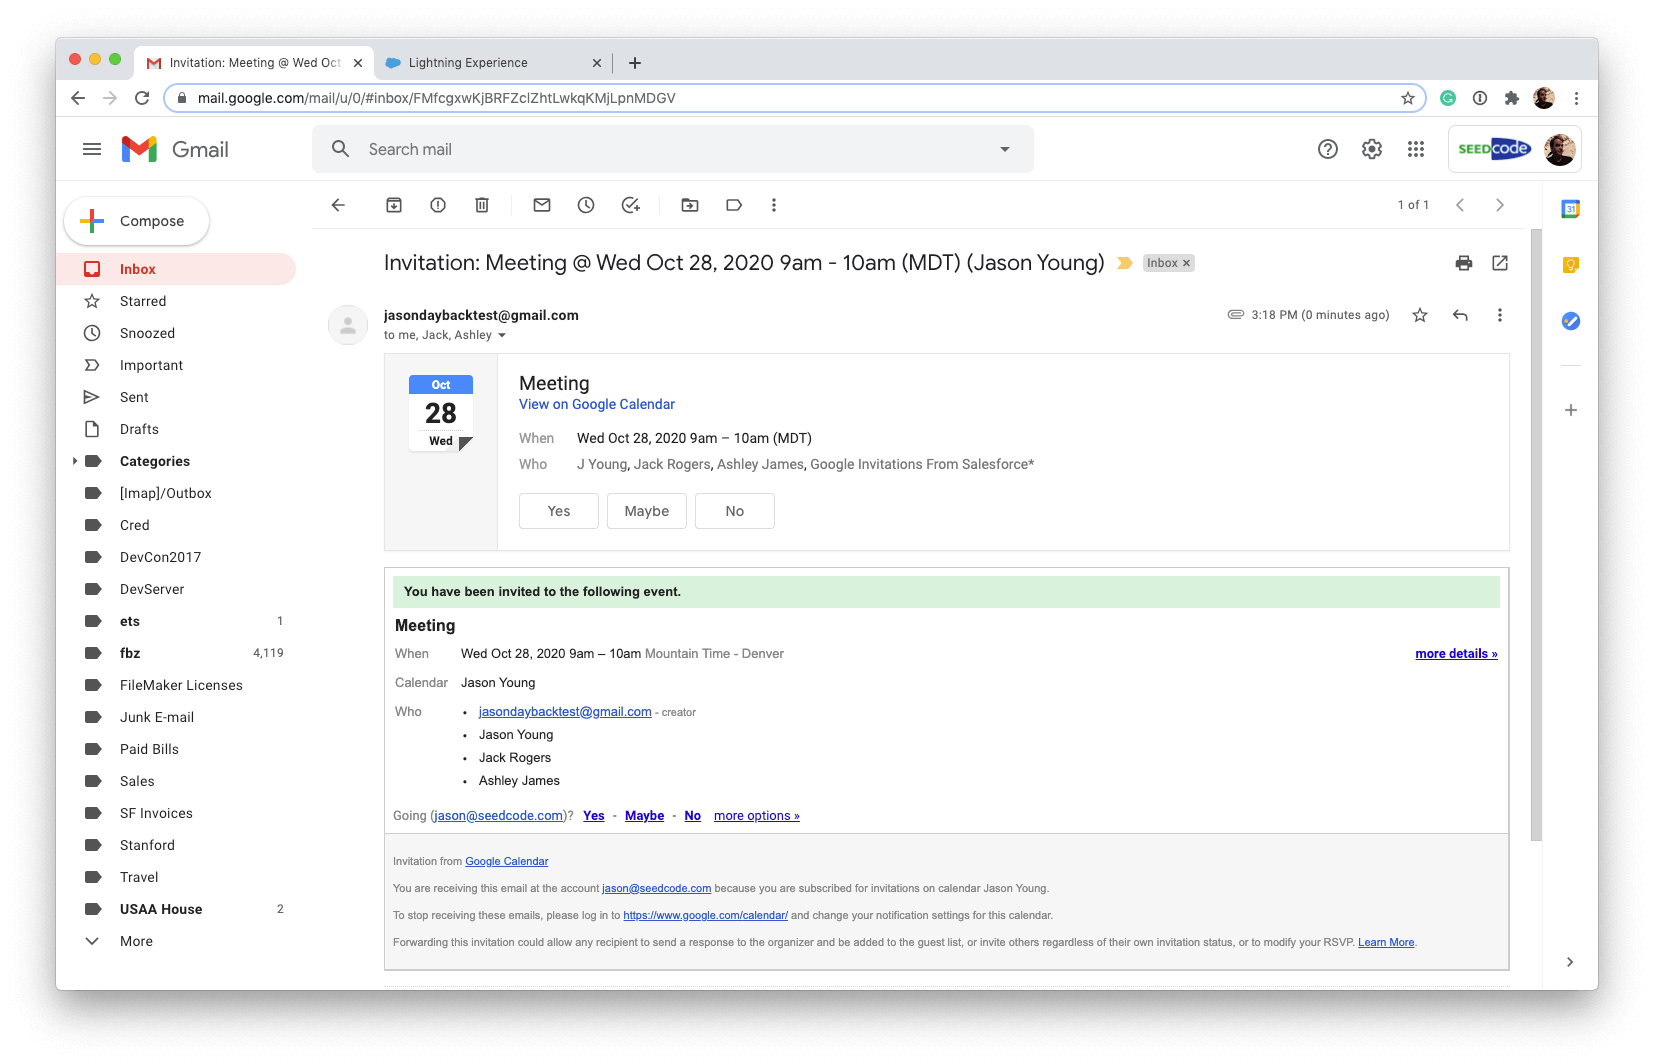
Setting up dedicated Google calendar (or calendars) to handle sending these notifications is recommended. Having it be single purpose and a direct representation of the Events calendar in Salesforce will make it easier to manage. You can create the new calendar in Google and then share it, with write permissions, to the other schedulers in your Salesforce org. When users have authenticated into Google in DayBack, the calendar will appear in the sidebar and needs to be there for these techniques to work, although it does not need to be selected. For this example, we named our calendar Google Invitations From Salesforce.
Custom DayBack actions
This technique consists of one custom button action and two custom event actions, and On Event Save action and an On Event Delete action.
You can download all 3 actions here.
Both the On Save and On Delete actions should have the setting Prevent default action set to Yes.
Each action has configuration variables at the top that you’ll need to update for your org in order to work.
- calendarName: the name of the google calendar you set-up to send the notifications. This variable is in all three actions and should be the same value in each.
- idField: the DayBack id of the custom field added to Events for storing the Google event id. This variable is used in all three actions and should be the same value in each.
- updateFieldId: the DayBack id of the custom field added to Events for storing the Google event id. This variable is used in the Custom Button Action and the On Event Save actions only.
- sharedActivities: Boolean variable for indicating whether the Salesforce org has Shared Activities enabled. This variable is used in the Custom Button Action and the On Event Save actions only.
- addAsName: Boolean variable for indicating whether to add attendees as related names to the Event if Shard Activities is enabled. This action is only used in the Custom Button Action.
The Custom Button Action is similar to the one in the previous article on sharing Events in Salesforce. It opens up a modal dialog in DayBack which allows the user to search for multiple Users and Contacts in their Salesforce org and add them as attendees for this event. In this example the button label is Attendees.
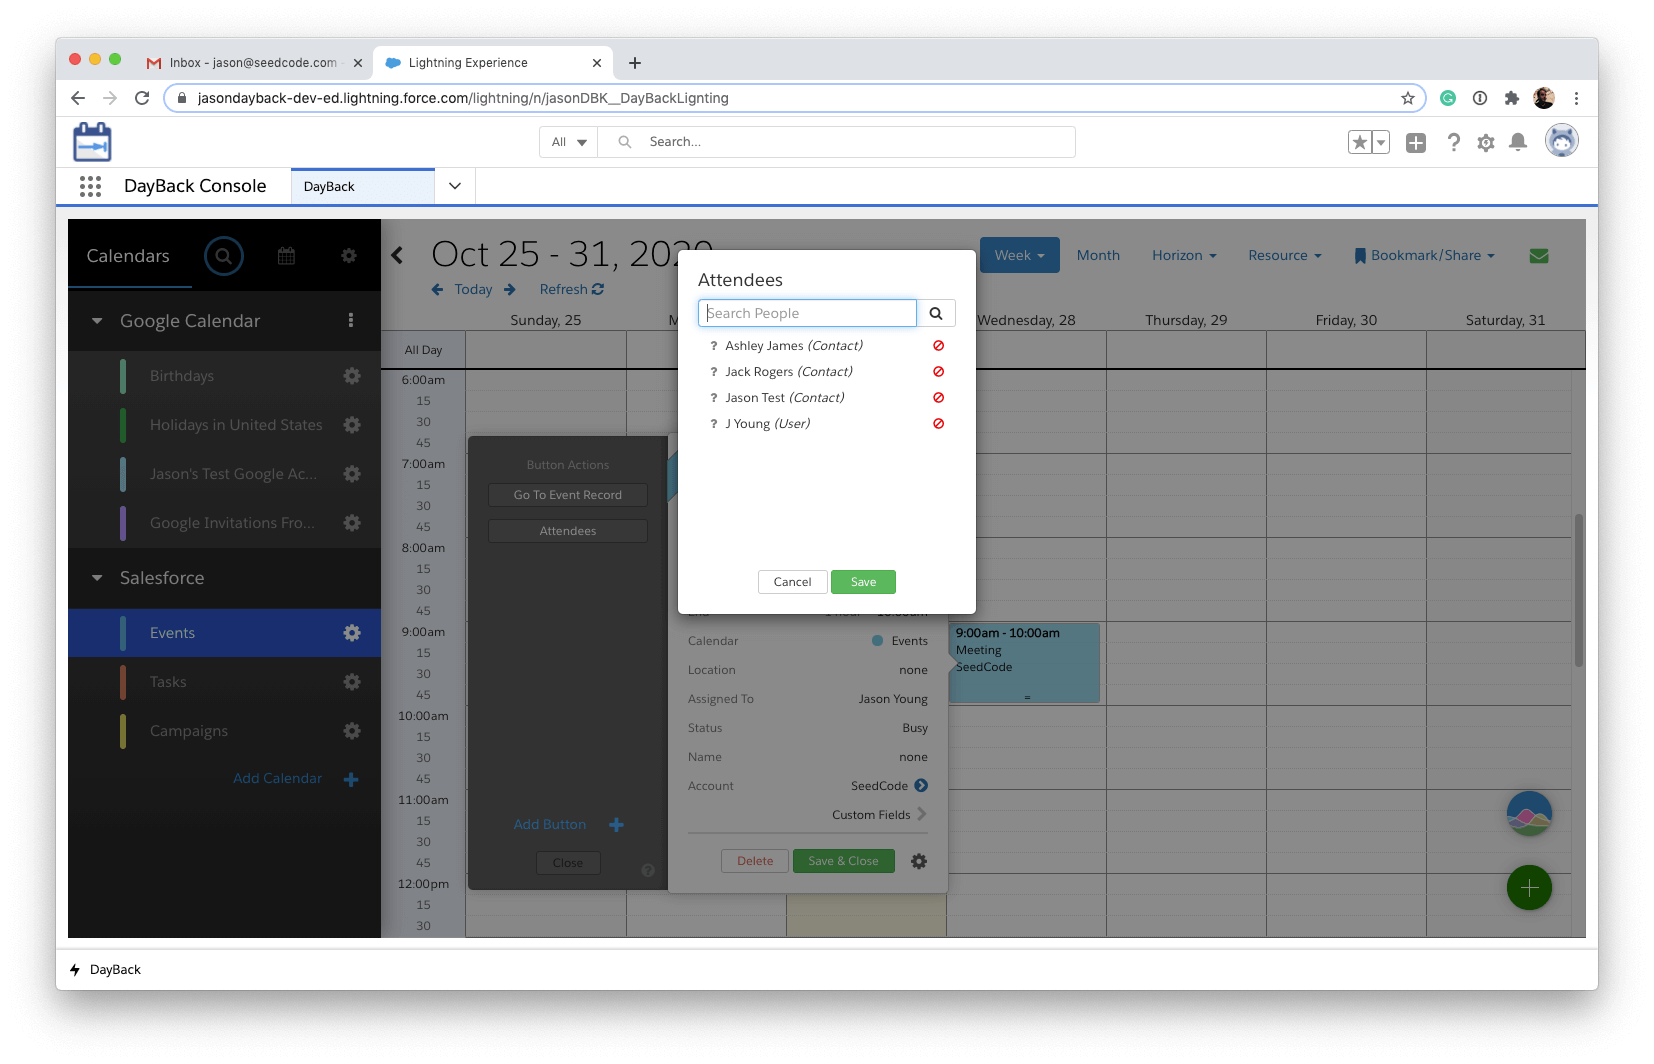
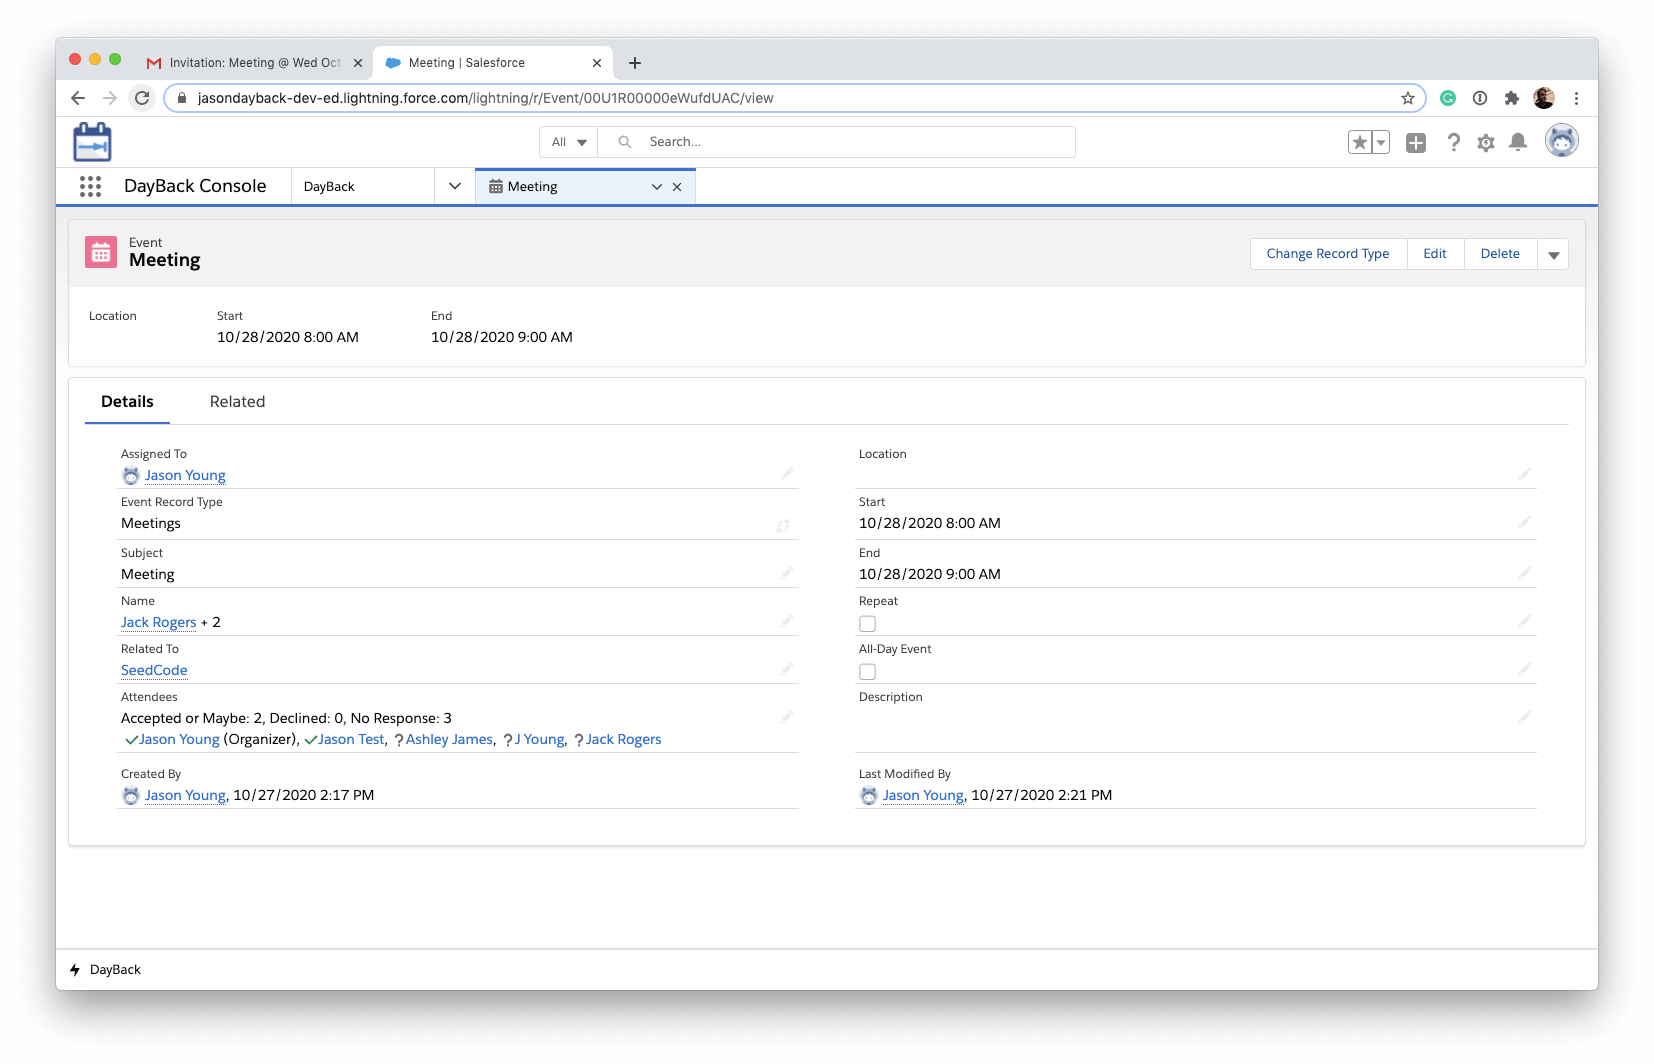
The On Event Save Action is similar to the one in the previous article about sending Google notifications, but in this action DayBack is going to query the EventRelation object to get the attendees for the Event and use this data for the attendees that are added to the Google event to receive their email notifications. The email address for each attendee is required for Google to be able to send the notifications. The query to the EventRelation object can pull the email addresses for attendees that are users via Relation.Email, but this returns null for any attendees that are Contacts, so a second query to the Contact object is required for their email addresses.
The On Delete Action is basically the same as the one in the previous post on Google notifications. It deletes the corresponding Google event when the Salesforce Event is deleted and tells Google to send cancellation notices to the attendees.
Capturing responses
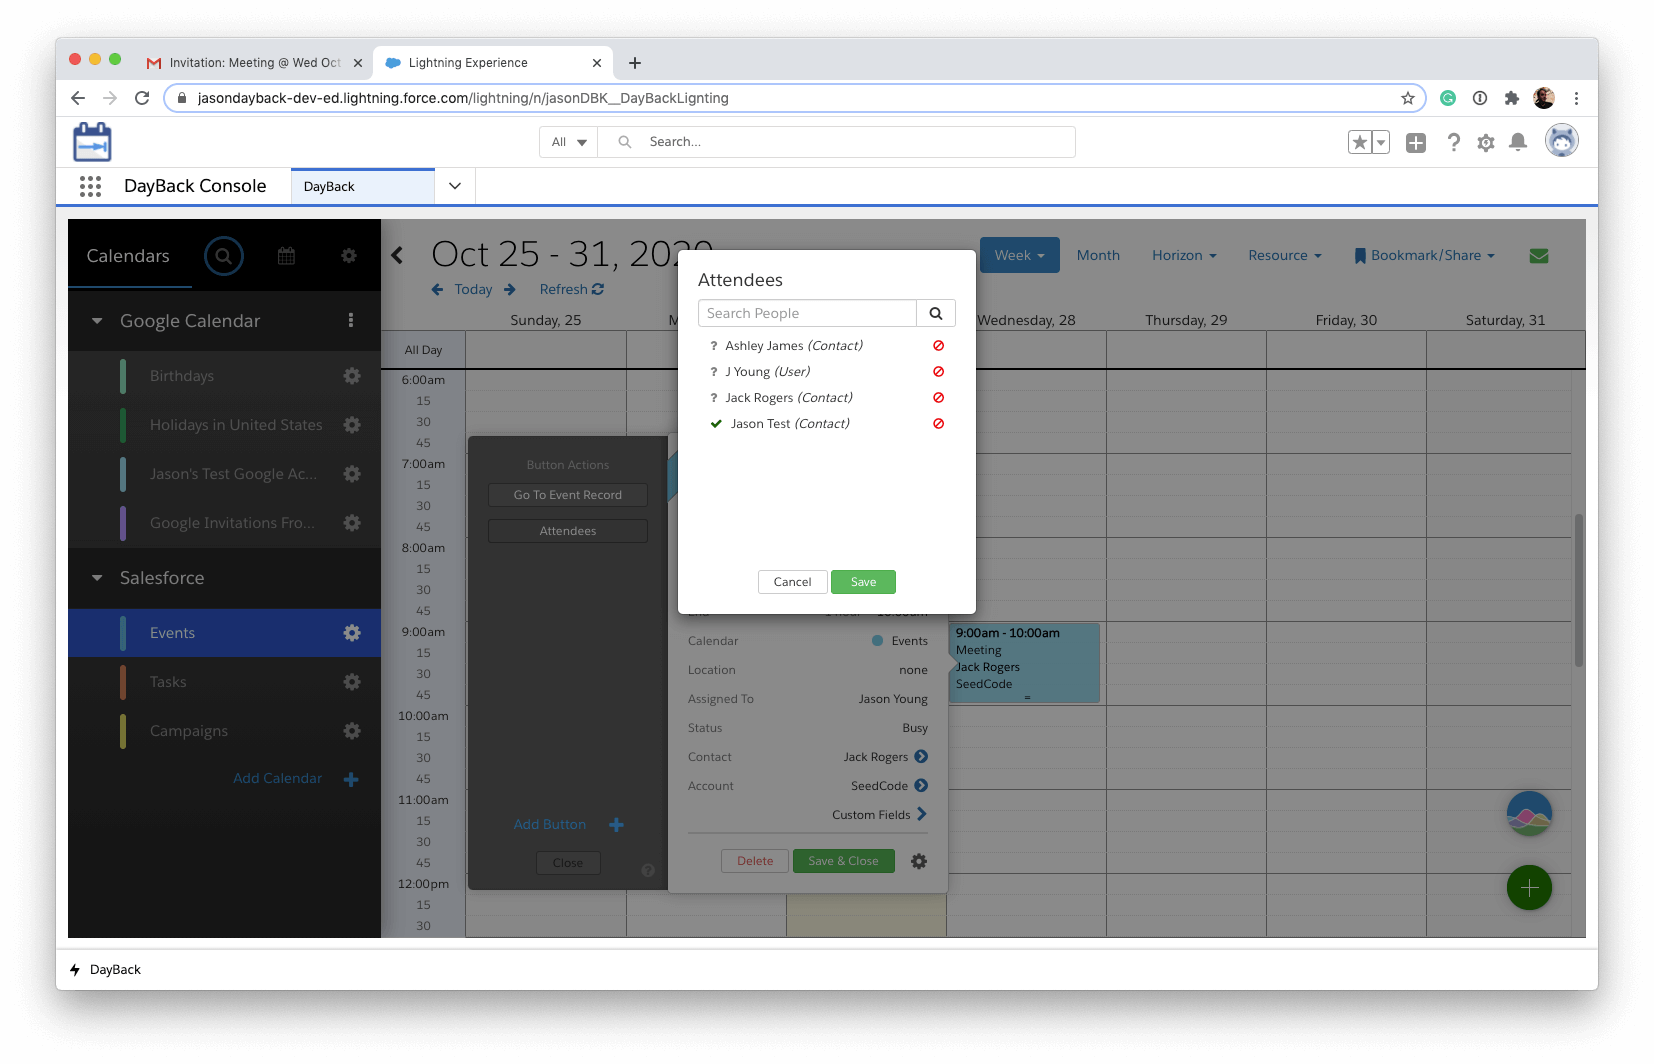
When an attendee accepts the invitation, then the Google event that sent the notifications can reflect that the invitation has been accepted. Not all email clients are able to send this acceptance back to Google, but if the Google event is showing that an attendee has accepted the invitation, then DayBack can capture this and update Salesforce accordingly. There’s no server side actions running to check for these status updates, so when the Custom Button Action is pressed DayBack will query the Google event and compare the attendee status in Google to the attendee status in Salesforce and update Salesforce accordingly.
Removing attendees
When an attendee is removed from an Event in Salesforce, then the routine will simply send the updated list of attendees to the Google Event. Google does a great job with this as it determines if an attendee has been removed and will send that attendee a cancelation notice. This works for adding subsequent attendees as well.
Conclusions
There are some limitations with having the updates run entirely inside DayBack. Most importantly is that if the Event is edited in a different app or native Salesforce page, then the updates to Google won’t be triggered. However, there is something intuitive about a client-side routine in that there is no mystery when the update will take place, which isn’t always the case with a server-side routine. Additionally, a client-side process is easy to correct as updating the Event in DayBack will pick up any changes made and outside of DayBack and update the Google event accordingly and get it back in sync with Salesforce. If you’re missing calendar email notifications in the Lighting experience, this may be the solution for you.
Hi Jason!
Do you have considered the flags “Guest Permission”?
In my org we use this mechanism, but i didn’t find a method to controll the google flags “Invite Others” and “See Guest List”.
This possible?
Hi Allesandro,
I don’t see anything in the Calendar API that controls this behavior. You can grant the permissions to Invite External Guests in the group set-up and the API should honor it, but there’s no way that I know of to prompt for this when using the API. These are the only attendee properties that are available:
“attendees”: [
{
“id”: string,
“email”: string,
“displayName”: string,
“organizer”: boolean,
“self”: boolean,
“resource”: boolean,
“optional”: boolean,
“responseStatus”: string,
“comment”: string,
“additionalGuests”: integer
}
],
Let me know if that helps and if I’m understanding you correctly.
My Best,
Jason