Background
DayBack offers its Salesforce users real-time access to their Google Calendars inside Salesforce. In this environment, DayBack can take advantage of calendar actions to link your Salesforce and Google records.
In a previous post, we examined some more straightforward examples, but in this series of articles, we’re going to look at some more advanced integrations between Salesforce and Google Calendar.
How it Works: Enabling the Salesforce Related-To and Name in Google Calendars
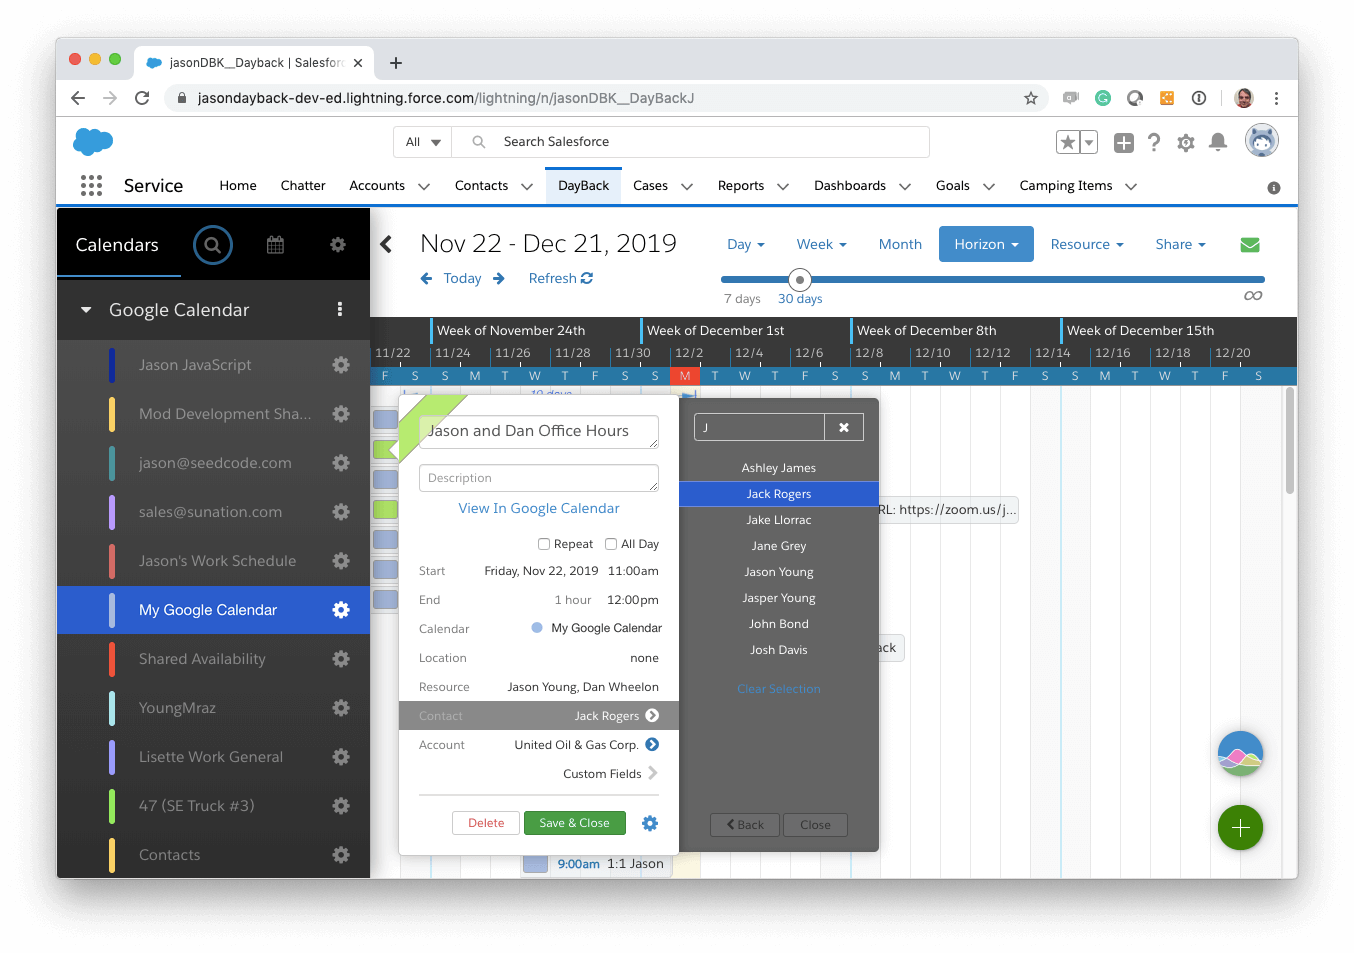
We’ve recently had more and more customers who want to use Google calendars in their DayBack environment either as a replacement for their Salesforce calendars or to extend their capabilities. So we’ve added the Name and Related-To (The Who and What) from Salesforce to Google Calendar so that Salesforce records are linked to Google events.

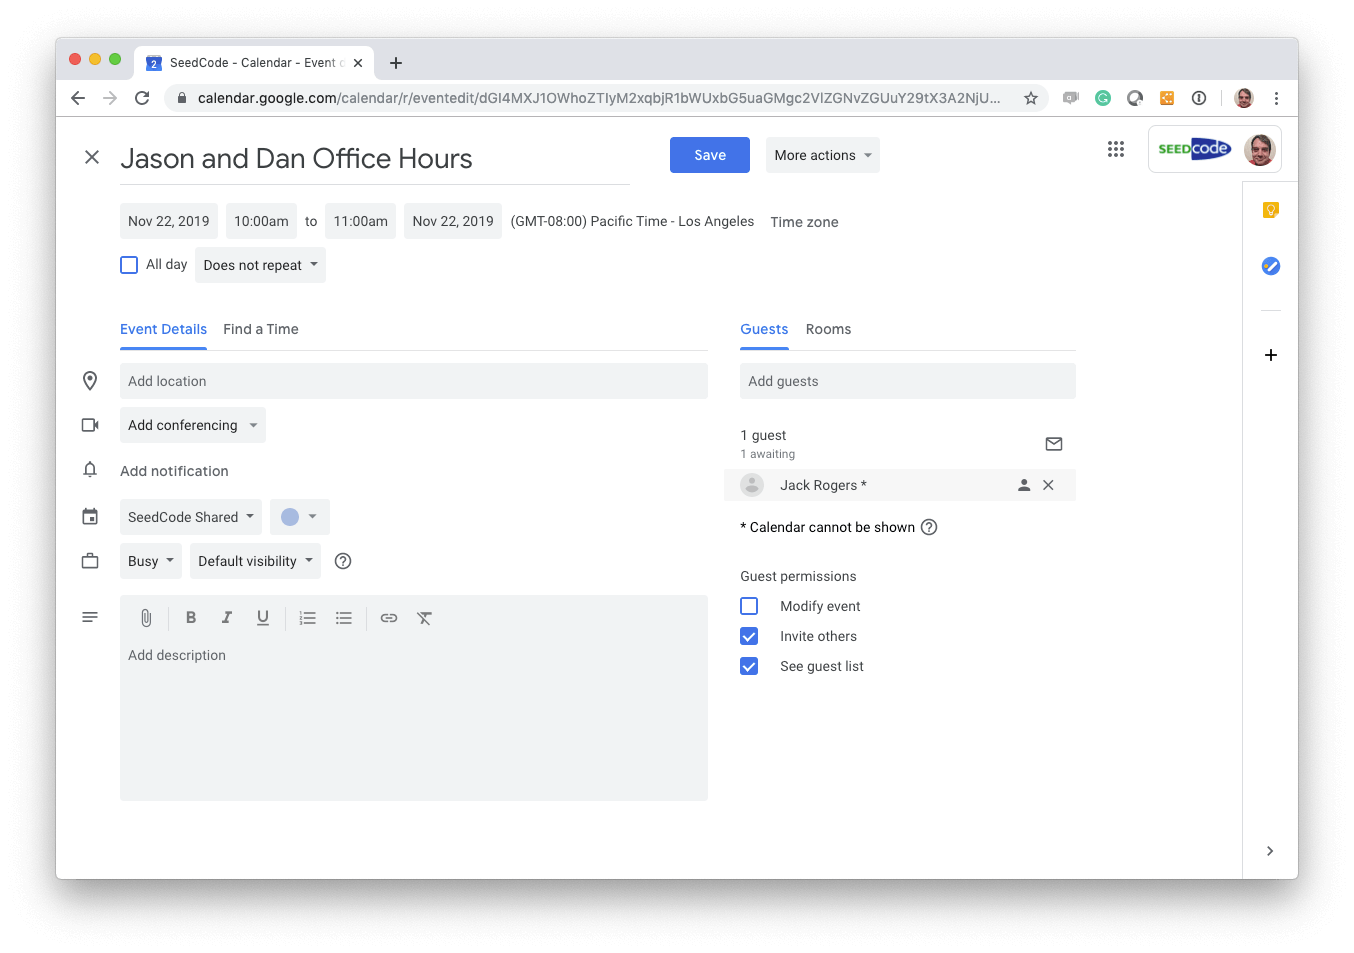
Additionally, if the Contact or Lead that’s associated with the event has an email address, that address gets added to Google’s attendee list and your Salesforce contacts can be sent notifications and updates when the Google Calendars event is modified.
Adding This to Your Instance of DayBack
This modification consists of a few related custom actions: one app action, and three event actions. The event actions include an On Event Click, a Before Event Save, and an On Event Save action.
You can download all these actions as .js files here.
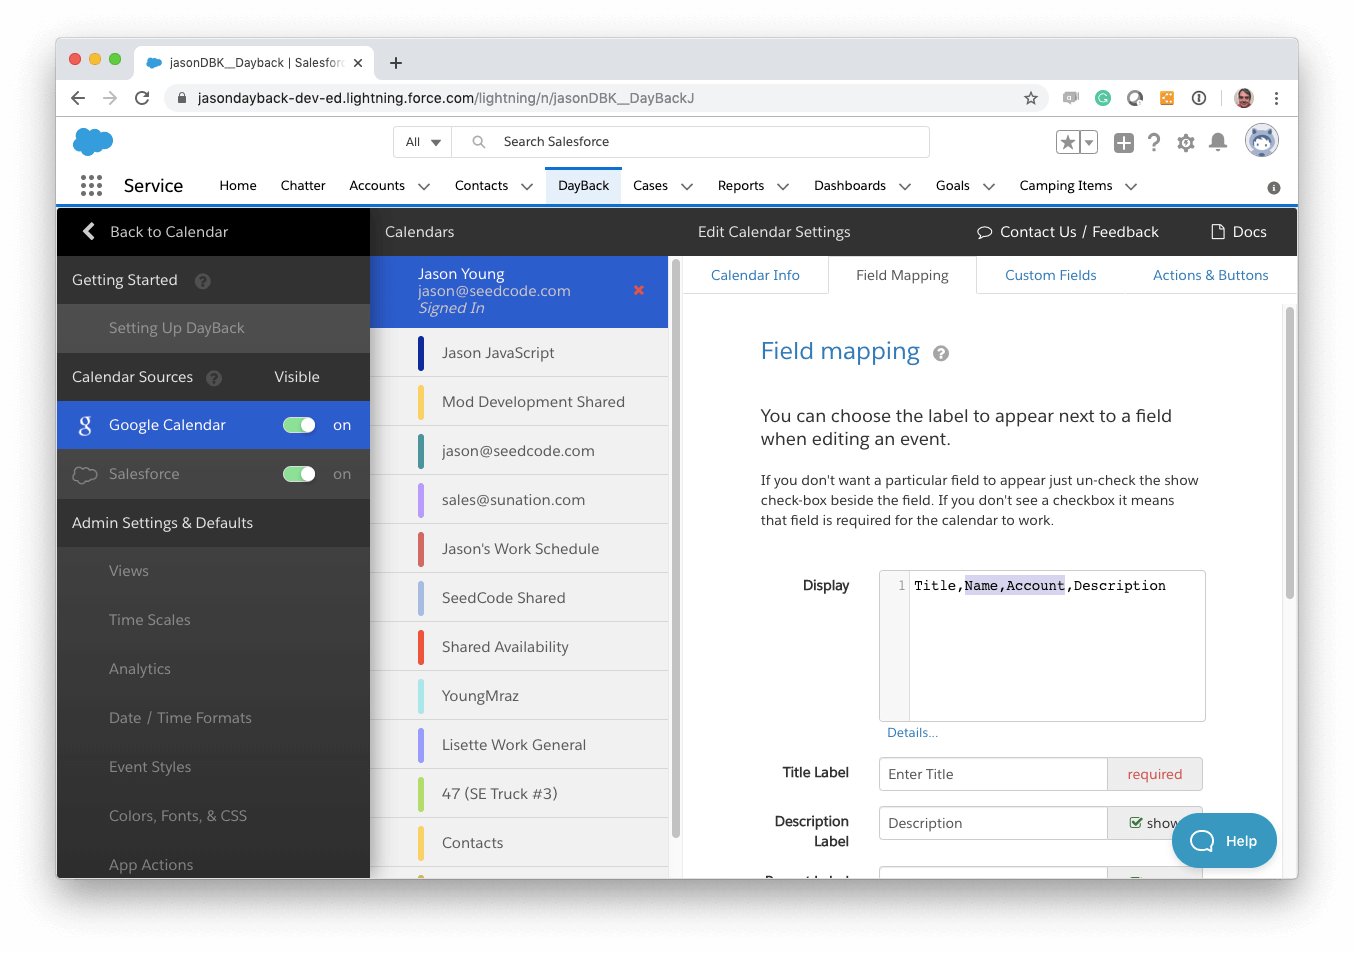
Before pasting the actions into your instance of DayBack, you’ll first need to add two custom fields to your Google Calendar set-up in DayBack. These fields will store the names of the linked records so they can be used in the display section of your Google field mapping. Name the fields whatever you’d like: the example below uses Name and Account. You will need to make a note of the fields’ Id for Calendar Action values, as they will be needed in the On Event Save action you’re going to paste in.


Once these custom fields are created, open the EnableSFContactsForGoogle-OnSave.js file and change the example values for the nameField and accountField to the Ids from the Custom Fields you just created.
var nameField = '1574432433979-6969386427'; var accountField = ‘1574432446101-6546058279';
Once you’ve done this, you can create the actions in DayBack and paste the code in from the .js files you downloaded. The other actions besides the On Event Save shouldn’t require any modifications to get up and running.
Set the prevent default action to “No” for all actions except the On Event Save action, which should be set to “Yes”
Once these are pasted in and configured, you should start to see the Name and Related To selectors available in your Google event popovers.
For Developers
Here’s a brief overview of what each action is doing and why each is required.
After Event Render Action
This action runs when events are done being rendered; it is the best action for making changes once all the calendars are loaded. Since this is done asynchronously, we want to use the After Event Render to make sure we have calendars loaded before we run the operation. This action adjusts the unused fields in the settings for the Google calendars and enables the contact and project fields. Additionally, it finds the functions that Salesforce uses to look up the contacts and projects and copies them over to the Google calendars so they can be used there. Originally we had tried to have all this logic live in the On Event Click action, but there was a little bit of flashing when adding the projects and contacts: by moving it to the After Events Render action the popover maintains it’s normal smooth opening behavior.
On Event Click Action
This action runs when an event is clicked or when a new event is created and opened. It is used to temporarily change some of the Google calendar settings to “fool” the popover to think it’s associated with a Salesforce calendar. By putting this logic in the On Event Click action we can ensure that these changes only apply when a popover is open (and that the settings changes will be reverted on the ensuing Before Event Save action.) Additionally, this action parses any contact or project data stored in the Google extended properties and initializes the contact and project selectors with those values.
Before Event Save Action
This action runs when the popover is closed, regardless of whether the event was actually edited or not. This action is needed to revert the temporary changes made during the On Event Click action when the popover is closed. Additionally, the Before Event Save action still has access to the values of the event before it’s been saved. This allows the action to capture the previous email associated with the Contact or Lead and remove it from the attendees’ list in Google if the email has changed.
On Event Save Action
This action runs when the event has been modified and the Google data is going to modified by the API. This action is where most of the work happens. Since Google doesn’t have fields to store the contact and project data, this action will store the appropriate values in a Google extended property. If the contact has been modified then this action will perform a SOQL query to get the email address for the selected contact. This email address is then added to the attendees’ list. If there are attendees, then the action will also present a dialog asking if notifications should be sent out.
Going Deeper
This is a great starting point for using Google events in Salesforce. But we have customers who also want to see this linking from the Salesforce side, both in terms of Activity History, from the perspective of the related Salesforce records, and for reporting purposes. We’ll be looking at how to tackle this in the next article in this series, so stay tuned!

Leave a Reply