Overview
Custom actions in DayBack Calendar let you add your own buttons to events in the calendar. These buttons are a great way to extend the calendar’s capabilities and a great way to use custom actions is to interact with third party applications: like GoToMeeting.
Note: if you’re using Zoom instead of GoToMeeting, you can find Zoom-specific instructions, actions, and videos here: scheduling Zoom meetings from Salesforce.
We schedule a lot of GoToMeetings at SeedCode. We’ve always done it manually often copying the meeting links into DayBack.
Since DayBack is the shared calendar we use to manage the business, it didn’t make sense to be duplicating work, both in GoToMeeting and DayBack. One quick search led me straight to GoToMeeting’s API documentation, so we set out to make some custom actions that would allow me to do all the scheduling, rescheduling, canceling and starting meetings directly in DayBack.
Here’s a video of it in action: https://vimeo.com/223027801
Scheduling GoToMeetings from Your Salesforce Calendar
Here’s how to add this capability to your copy of DayBack Calendar for Salesforce.
1. Getting an API Key for GoToMeeting
To permit DayBack’s communication with GoToMeeting, you’ll need to create a custom app and generate an API auth token. Both of these tasks are completed with your GoToMeeting account and are as simple as filling out a form. For more instructions on creating an app and generating your auth token, see the GoToMeeting API Getting Started documentation here: https://developer.citrixonline.com/how-create-developer-app
If you’re integrating DayBack with Zoom (files are a bit further below), you can skip this step as our integration with Zoom doesn’t use API keys.
2. Download the Custom Actions
Custom Actions in DayBack Online are written in JavaScript so they are pretty easy to modify if you want to change the default behaviors. But you can use the ones you’ll download here with almost no modification.
The fully featured DayBack Online – GoToMeeting integration shown in the movie above requires 3 custom actions and 3 event actions, giving you conflict detection and resolution, and making sure rescheduled events are synced to GoToMeeting.
If you’re not interested in all those features, we’ve included a simple version of the Create GTM script that will just check if the event is in the future and schedule the GTM meeting.
Here’s the list of files you’ll need in the next step (download them here) Similar files for scheduling meetings in Zoom are here. Instructions are almost exactly the same but you don’t need an API key for Zoom:
- CreateGTM – Custom Action – Handles the creation of new meetings
- CreateGTMSimple (Optional) – Custom Action – Simple create meeting function
- DeleteGTM – Custom Action – Handles the manual deletion of existing meetings
- EventClick – On Event Click Event Action – Saves the event’s scheduled time before editing for use in the EventSave script
- EventDelete – On Event Delete Event Action – Checks if GTM details exist and prompts to delete meeting
- EventSave – On Event Save Event Action – Checks if the event time has changed and prompts to update GTM accordingly
- StartGTM – Custom Action – Starts a meeting if the details exist in the event description
3. Add the GoToMeeting Actions to DayBack
Add these scripts to your DayBack app by going into the Administrator Settings, choosing your calendar source (this works with Google and Salesforce sources) and pasting each file’s contents into a new event or custom action field. For the event actions, you’ll select the type of action in the dropdown (On Event Click, On Event Save, or On Event Delete). For custom actions, you just need to give each one the name that you would like to see on the custom action button. Check out our documentation on custom actions here for more information.
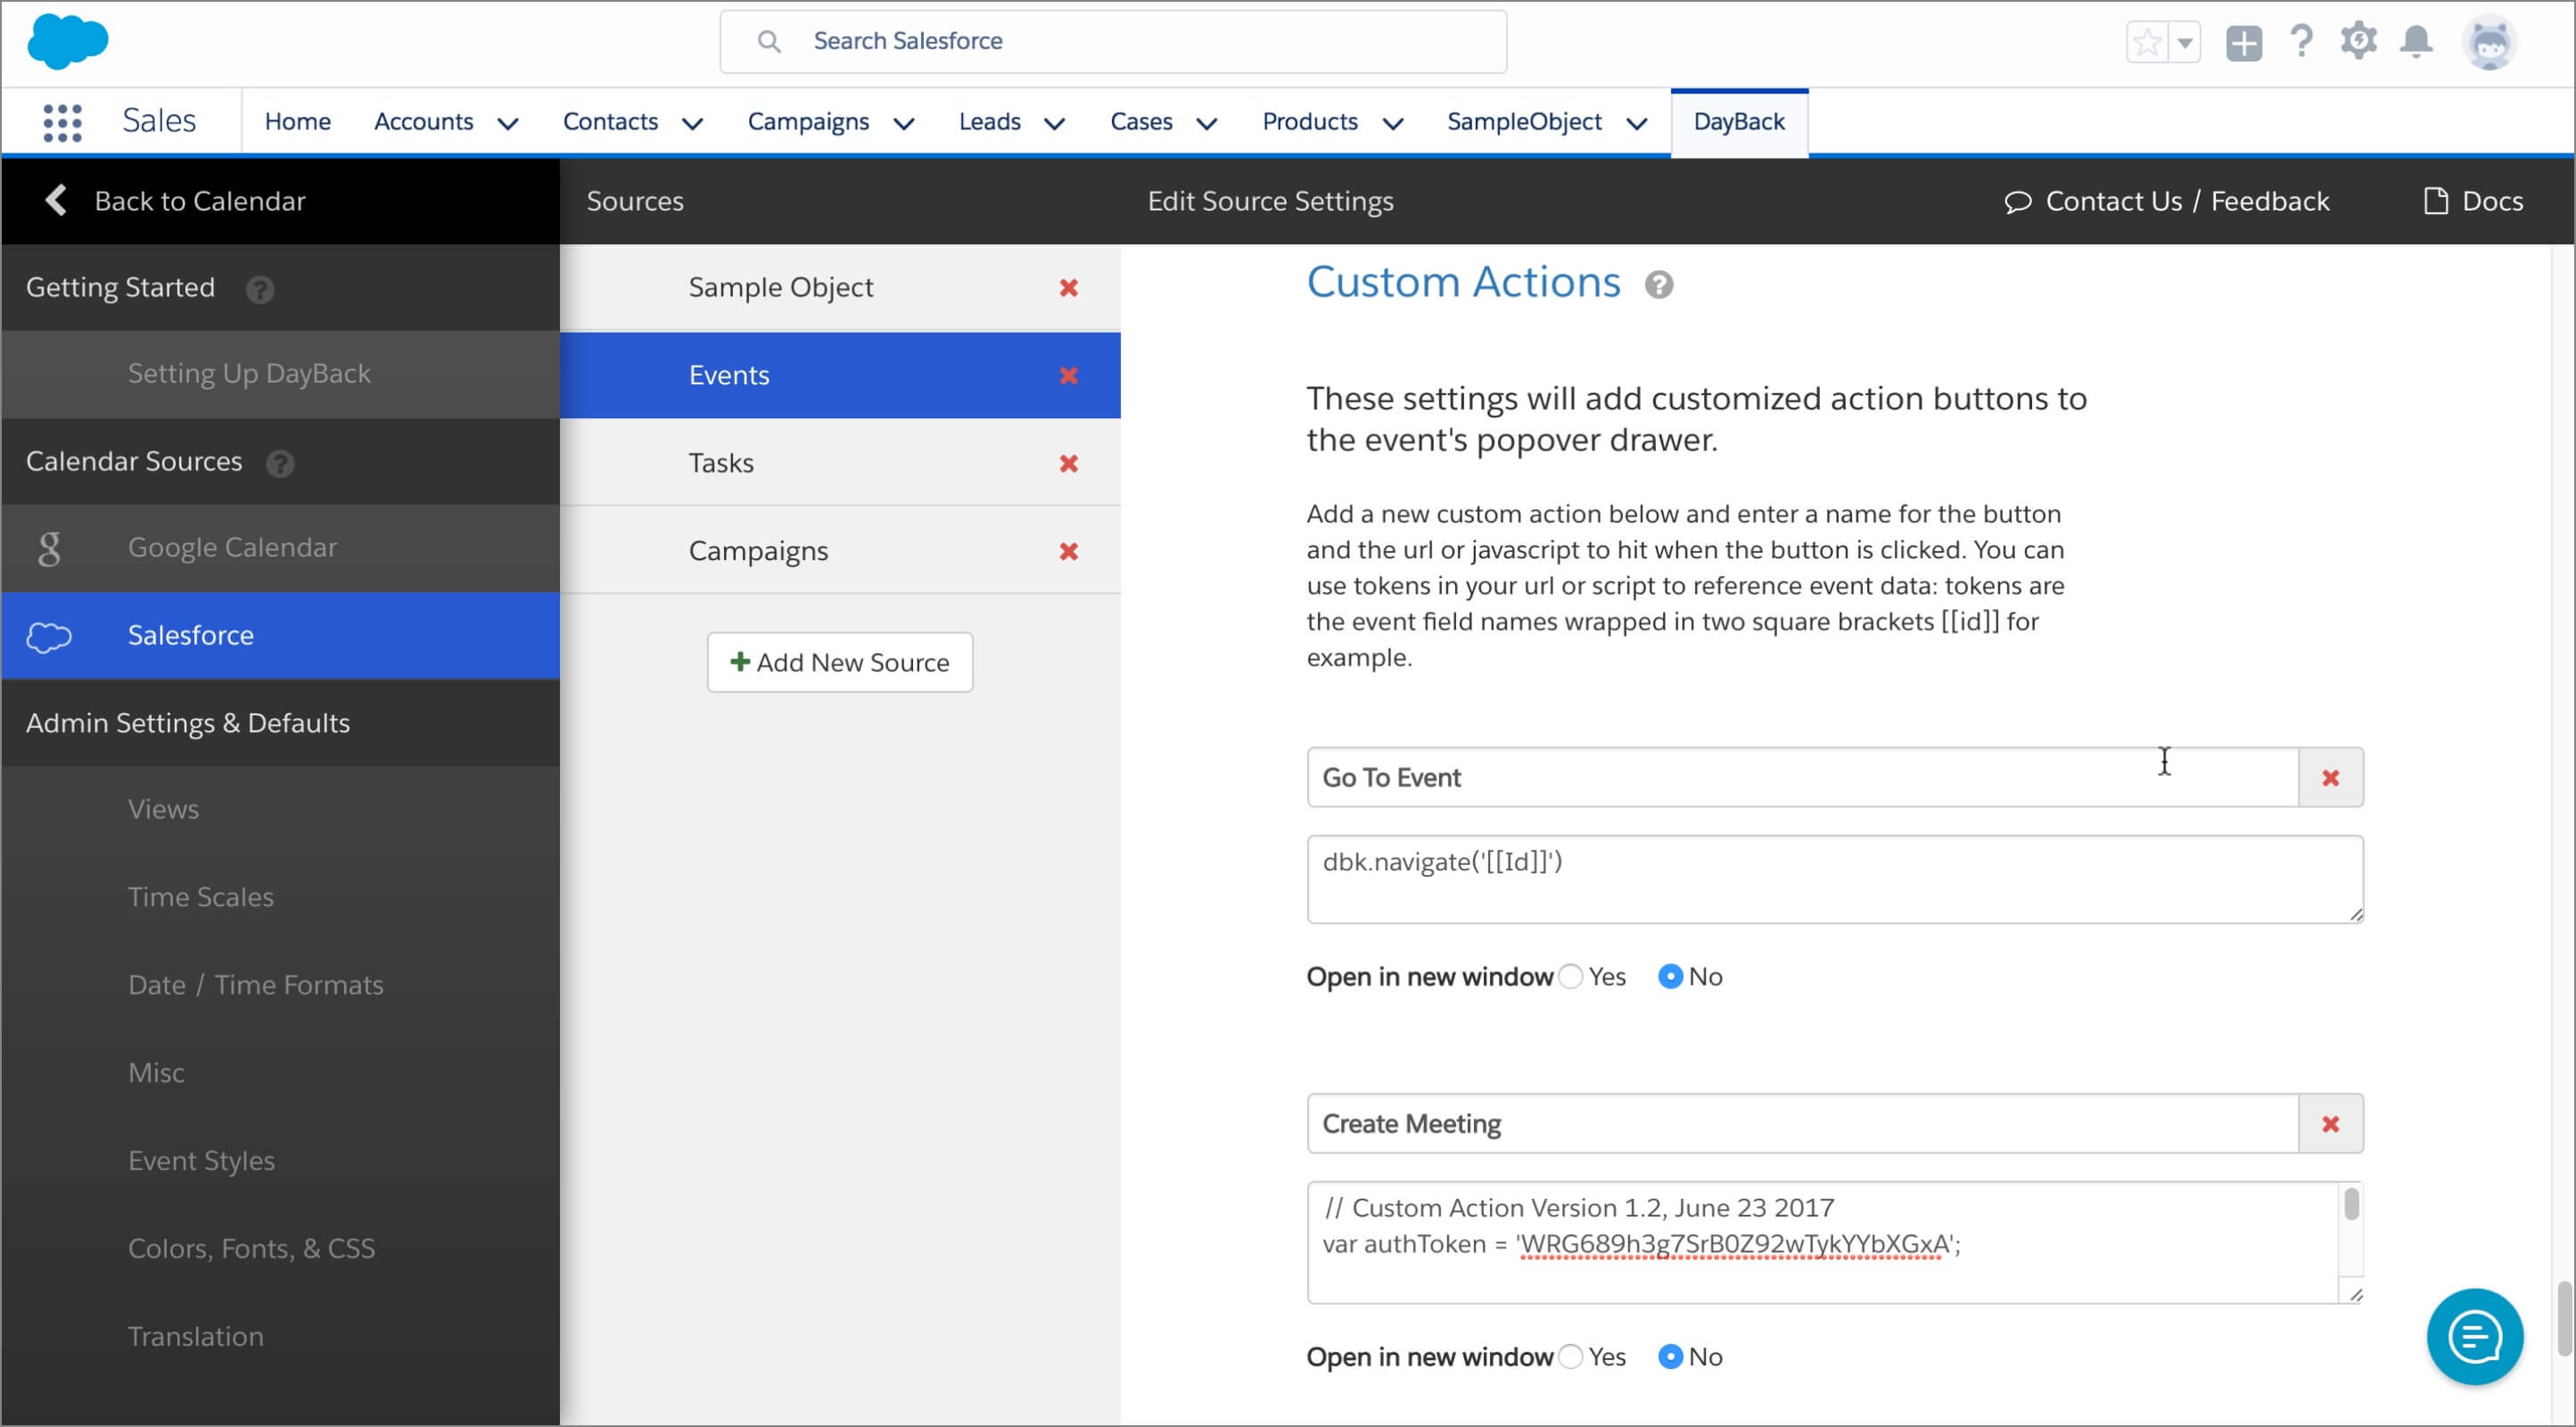
If you’re adding these to the Event object in Salesforce, all you’ll need to do is add your GoToMeeting API Auth Key from step 1 into the top line of each script (except for the Event Click action). If you’re adding these to another object, you’ll also need to make some simple changes to each action in the next step.
4. Modifying the Actions for Your Objects
Each of these actions (except the Event Click action) references fields in your Salesforce object in [[brackets]]. The examples you download use the standard fields in the Events object so if you’re using Events you won’t need to change these. But if you add the actions to another source, you’ll need to replace each of the fields in [[brackets]] with the field name in your object. So [[StartDateTime]] might become [[InspectionDateTimeStart_c]]. Note that these start and end fields need to be datetime fields (not just dates).
If you’re using these actions with a Google calendar, there are no “fields” to match: please download this version of the actions that is tuned for Google Calendar. You won’t need to make any changes to these except for adding your GoToMeeting API key.
That’s it! Return to the calendar and start scheduling meetings =)
Conclusion
DayBack’s custom actions can interact with many different applications. This example shows how fully-featured such custom actions can be. They can check for conflicts and permit rescheduling in addition to simply linking records. If you’re interested in connecting your DayBack solution to a 3rd party application, but don’t feel up to the task of creating your own actions, we offer Implementation Packages where we can develop these to meet your requirements. If this interests you, please reach out.
Want more sharing options? DayBack Calendar also works in Salesforce Communities (http://docs.dayback.com/article/88-salesforce-communities) and you can even let folks subscribe to DayBack (or any Salesforce object) following our instructions here: https://dayback.com/subscribe-to-a-salesforce-calendar-public-ics-feed/